Artful Academia
The musings of a landscape painter, art teacher, and art history lover
Watercolor Painting Tutorial: Painting a desert landscape with a cloudy sky and mountains.10/2/2023 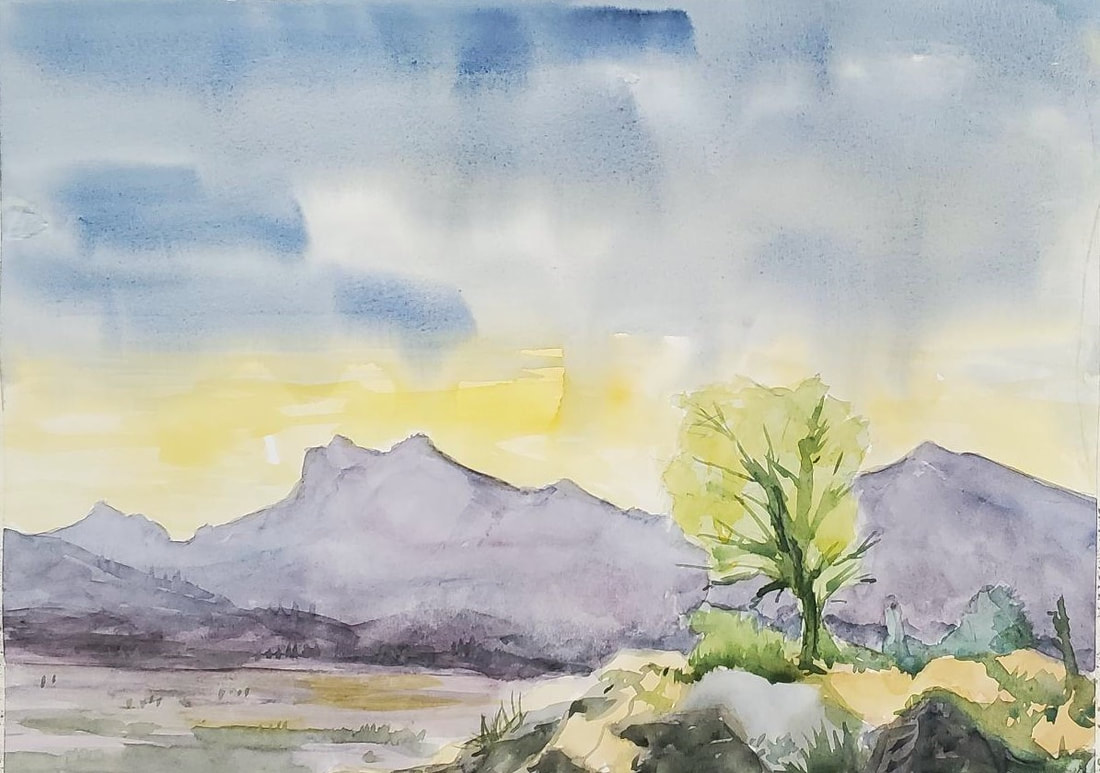 "Sonoran Mist" by Bruce Black, 2023. Watercolor on paper. Discover the art of painting a captivating desert landscape with a stunning cloudy sky and majestic mountains in this watercolor tutorial. This painting lesson expands upon the painting exercises outlined in my previous post, which covered techniques for creating a wash, rendering clouds, and painting trees. In this watercolor demonstration, students will apply these acquired skills to create a simple desert landscape featuring a cloudy sky, distant purple mountains, and a foreground tree. In case you missed it, you can find the 1st watercolor lesson HERE. Following this painting unit, my students will embark on their final watercolor painting project. In this project, they will put into practice what they have learned and incorporate a pen and ink drawing of a boat. The inclusion of pen and ink will assist them in adding finer details while allowing them to focus their watercolor application on the broader areas of the painting. The results are typically impressive, and I will be sharing this lesson in the near future. For Art TeachersThis lesson plan usually takes about four to five one hour class periods. I set up an easel at the front of the class and demonstrate each section for them. I paint, then they paint. I also discuss the following watercolor painting vocabulary:
Wash: In watercolor painting, a "wash" refers to a thin, transparent layer of diluted paint applied to create a smooth, even tone or background color. Washes often begin with an initial layer of clear water painted onto the paper. Drybrush: "Dry brush" refers to a technique where an artist uses a brush with very little water or paint to create textured and fine details, often by applying the brush with a light touch over dry or partially dry paper. This technique produces a scratchy, broken, or stippled effect, adding texture and definition to the artwork. Wet into wet: In watercolor, this technique refers to when you paint in an area and then add color that area before it dries. This method allows blending to occur on the paper and creates soft edges. Wet into dry: This watercolor technique refers to when the artist paints directly onto the dry paper or over an area of the painting that has already dried completely. This process creates hard edges. Value: Value plays a pivotal role in landscape painting, shaping the visual hierarchy. Generally, the sky holds the lightest value, followed by flat land areas, while mountains assume a mid-value. Vertical elements like trees are the darkest. However, manmade structures, like houses, silos, or barns, may diverge from these rules, influenced by their color and shape. For instance, a distant white house can appear as an exceptionally light value. Shape: Creating interesting shapes is also critical for a good landscape painting. All your largest areas are essentially broken down into shapes first. The mountains should have unpredictable undulations and the trees should have natural varied shapes. 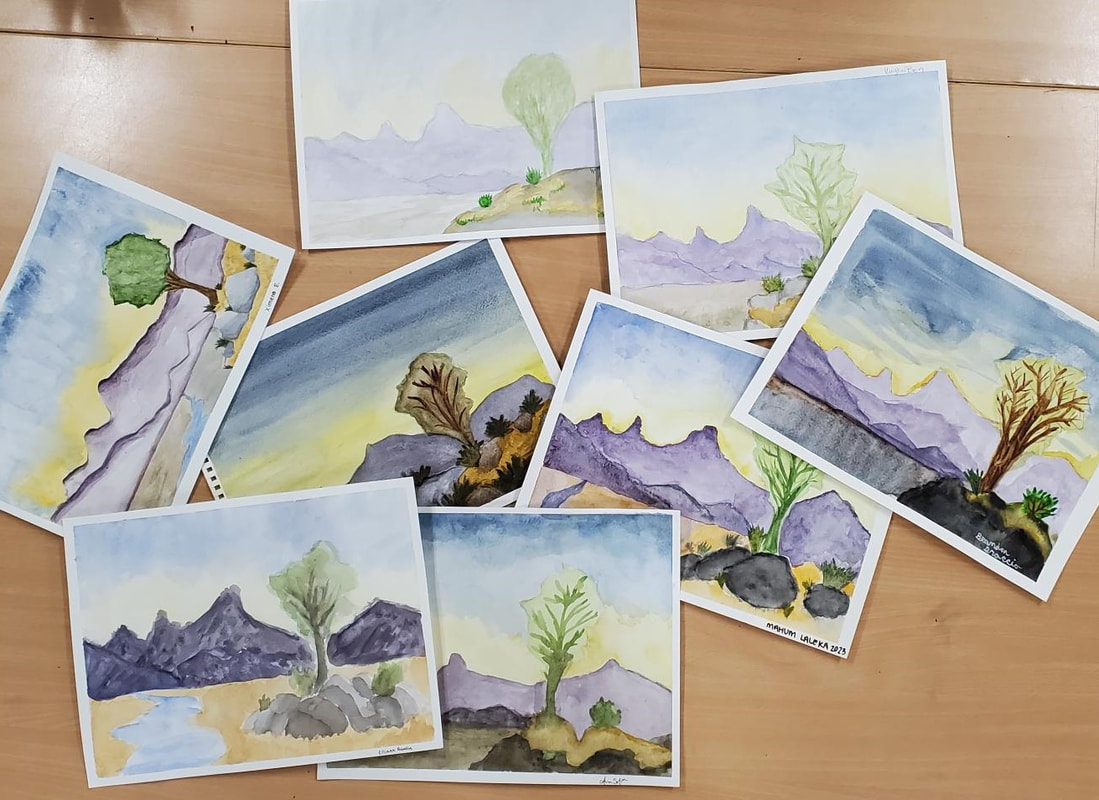
Examples of student watercolor paintings.
Watercolor Tutorial LessonSupplies: For this lesson, you will need the following: 140 lb watercolor paper, masking tape, a pencil, a watercolor brush (a #12 or #14 round and flat will work great), a cup of water, paper towels, watercolor paints with a mixing tray, and a hardboard to tape your paper onto.
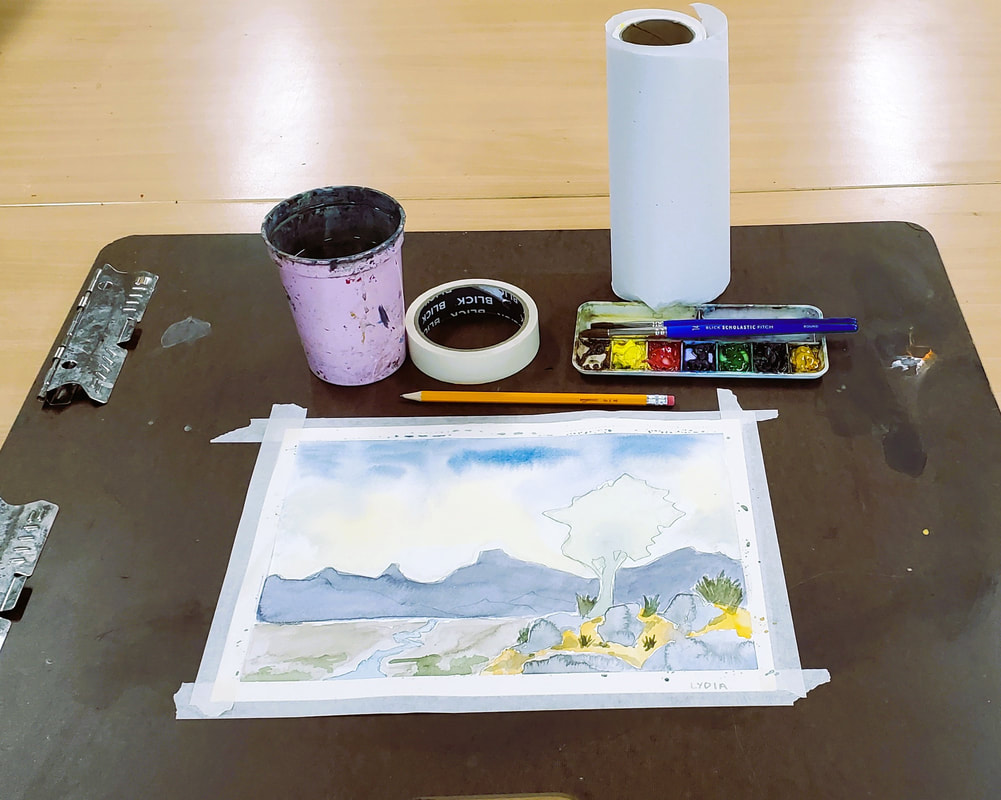
Preparation: Tape your paper to your board by taping all the edges around. This will help ensure that the paper dries flat. Do not remove the tape until your entire painting is complete and dry. Also, add a few drops of water to your trays of watercolors to soften them up. Watercolor Tutorial Lesson: Part 1
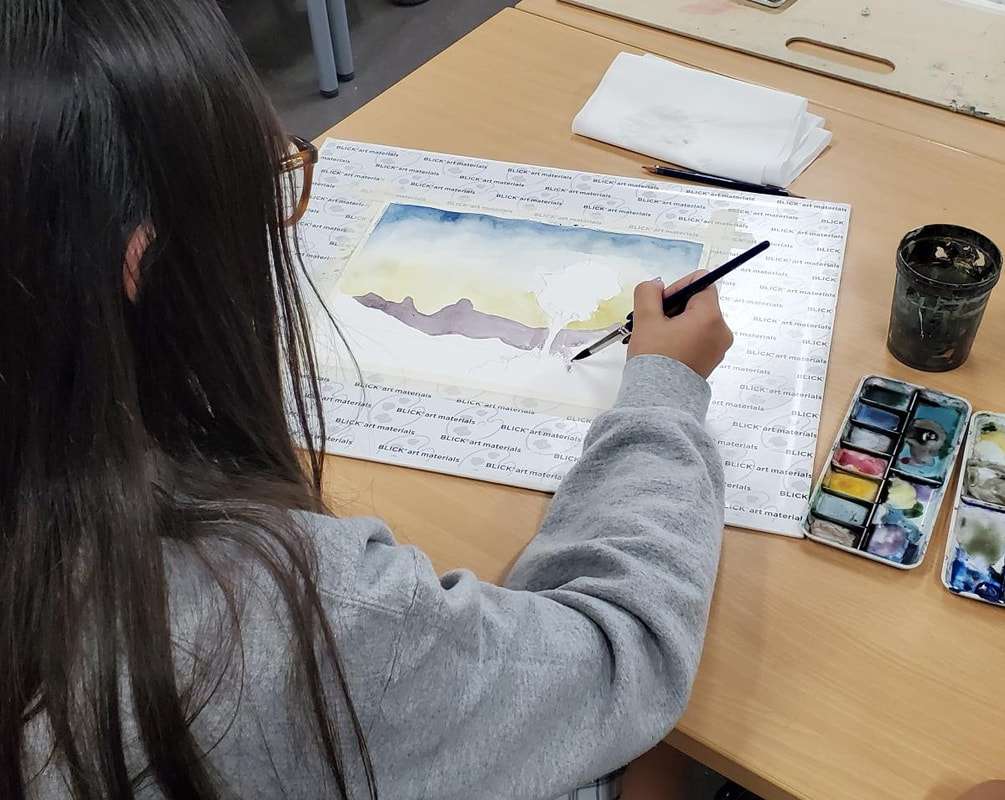
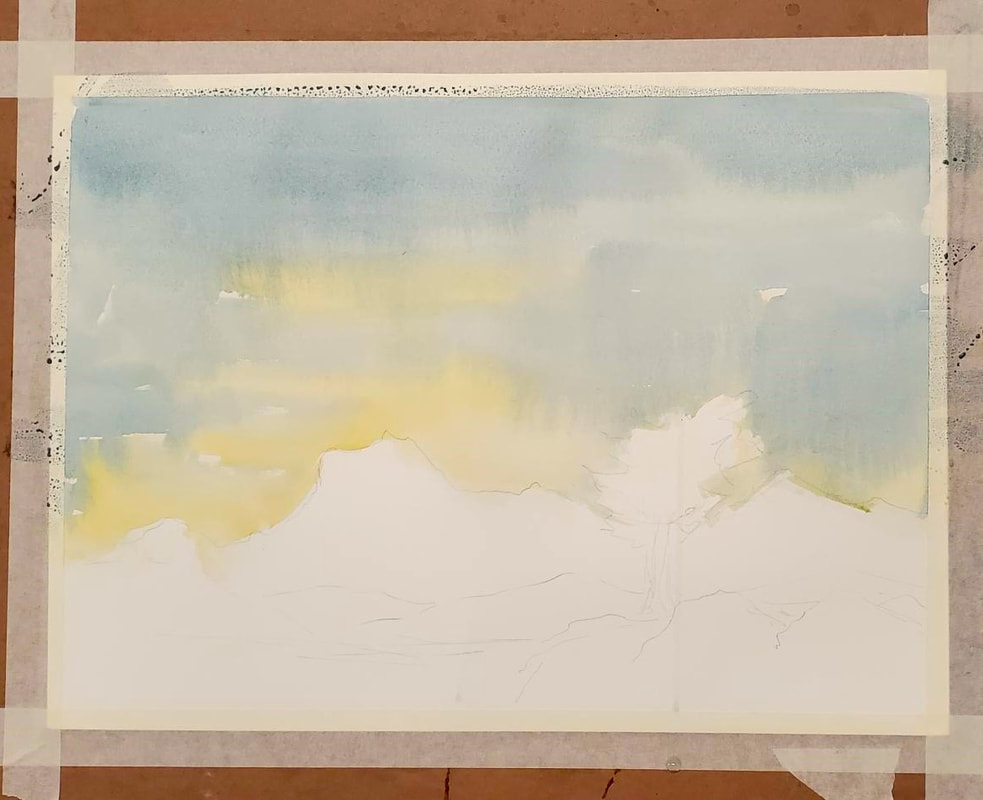 Start with the sky Watercolor Tutorial Lesson: Part 2
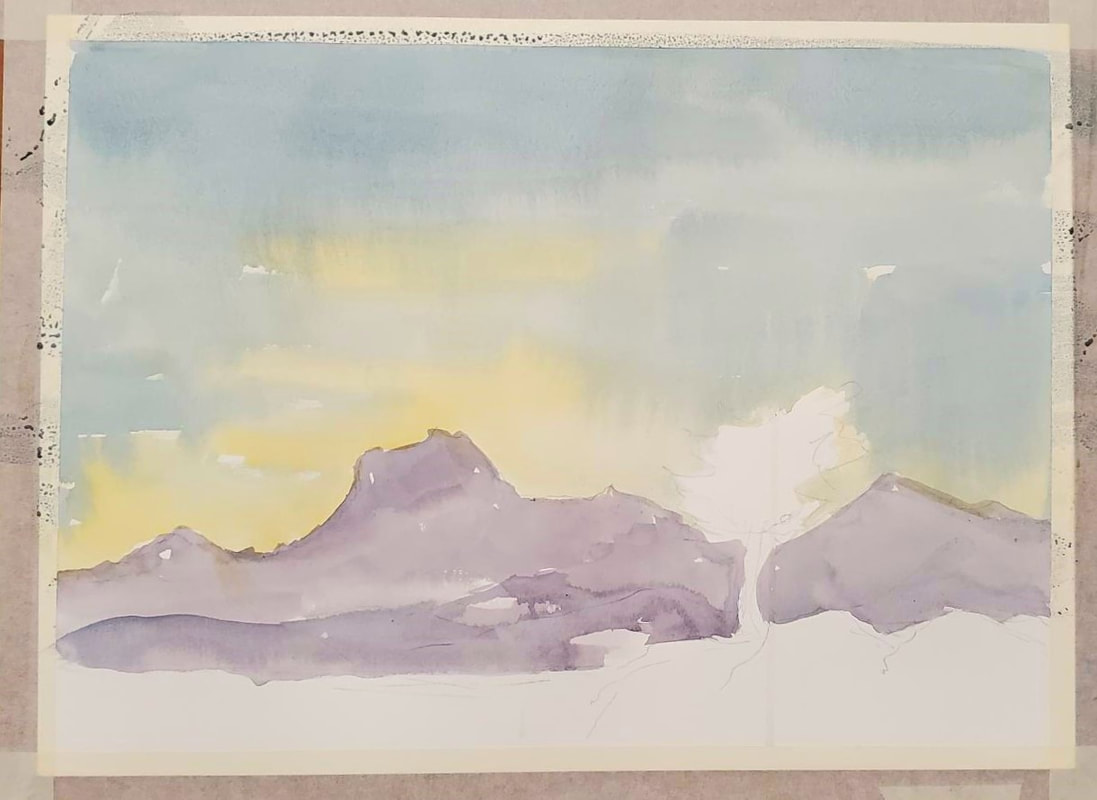 Next, add some purple mountains. Watercolor Tutorial Lesson: Part 3
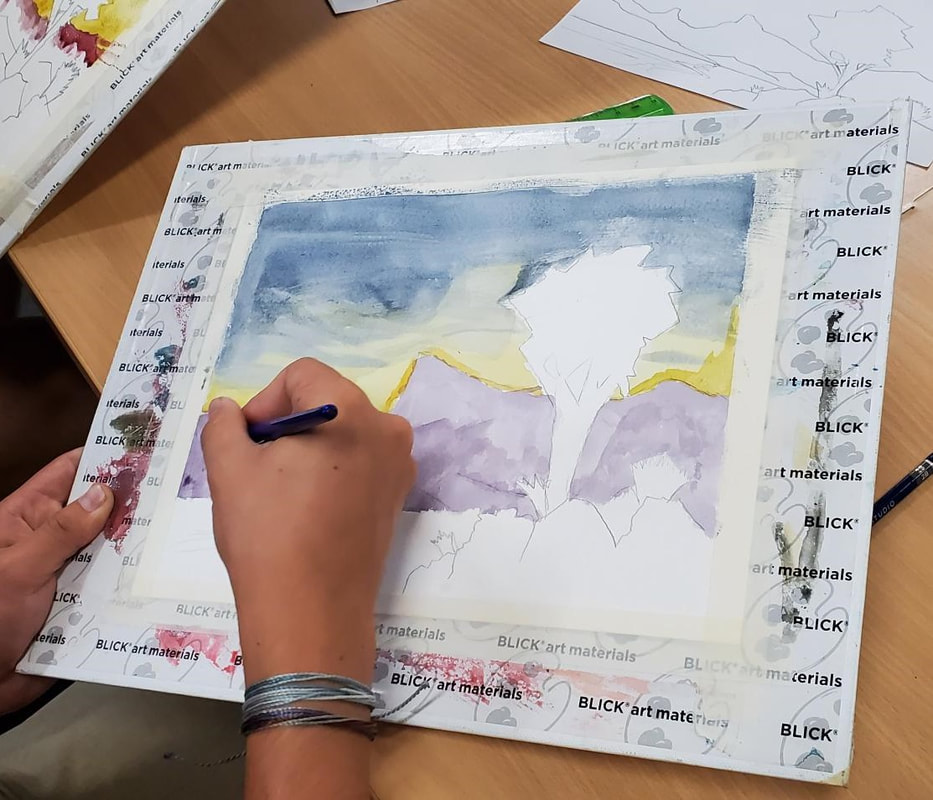
Watercolor Tutorial Lesson: Part 4 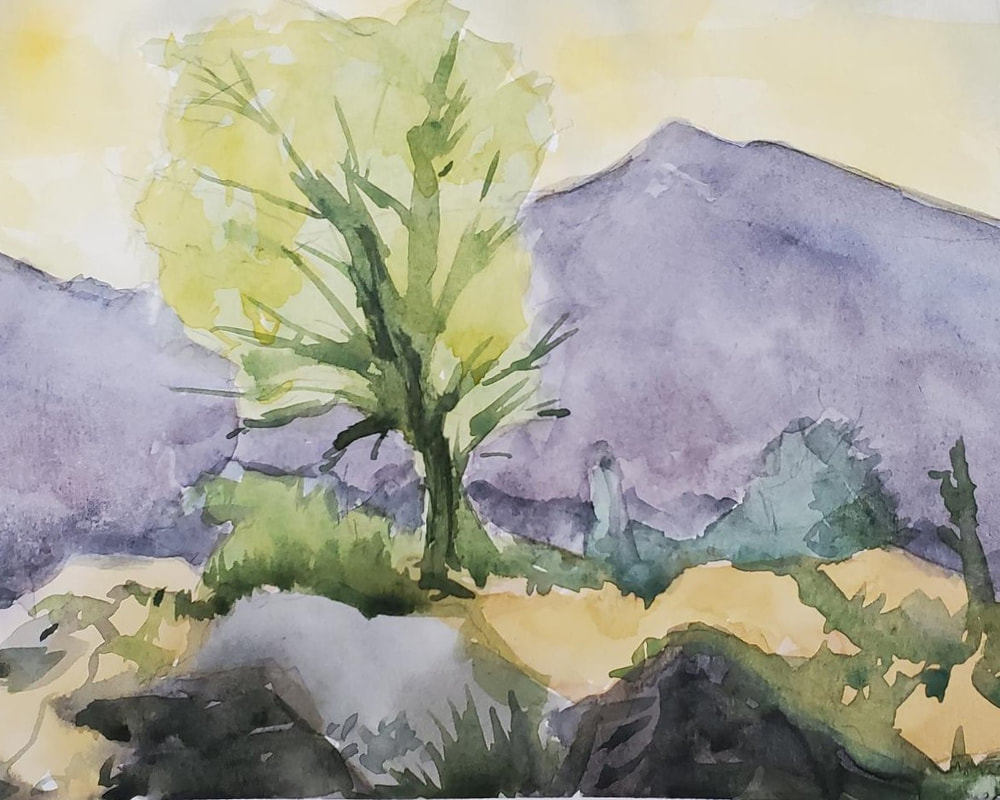 Paint in the foreground and tree. Paint in the foreground and tree.
Finished painting, "Sonoran Mist" by Bruce Black 2023
Further Practice: For further practice, try copying this watercolor painting by the artist Winslow Homer. Begin the same way, with a light pencil drawing. Then, start with sky and work your way down. Winslow Homer (1836-1910) was a renowned American artist known for his significant contributions to both American art and the medium of watercolor painting. Born in Boston, Massachusetts, he began his career as an illustrator before transitioning to become one of the preeminent painters of the 19th century. Homer's mastery of watercolors revolutionized the medium, with his works marked by their remarkable realism, vibrant use of color, and an ability to capture the essence of nature and everyday life. His coastal and marine-themed watercolors, including iconic pieces like "The Gulf Stream" and "Breezing Up (A Fair Wind)," showcased his deep connection to the sea and an innate talent for depicting the power and beauty of the natural world. Winslow Homer's influence on American art continues to be celebrated for his pioneering achievements in watercolor painting, leaving an enduring legacy in the art world. 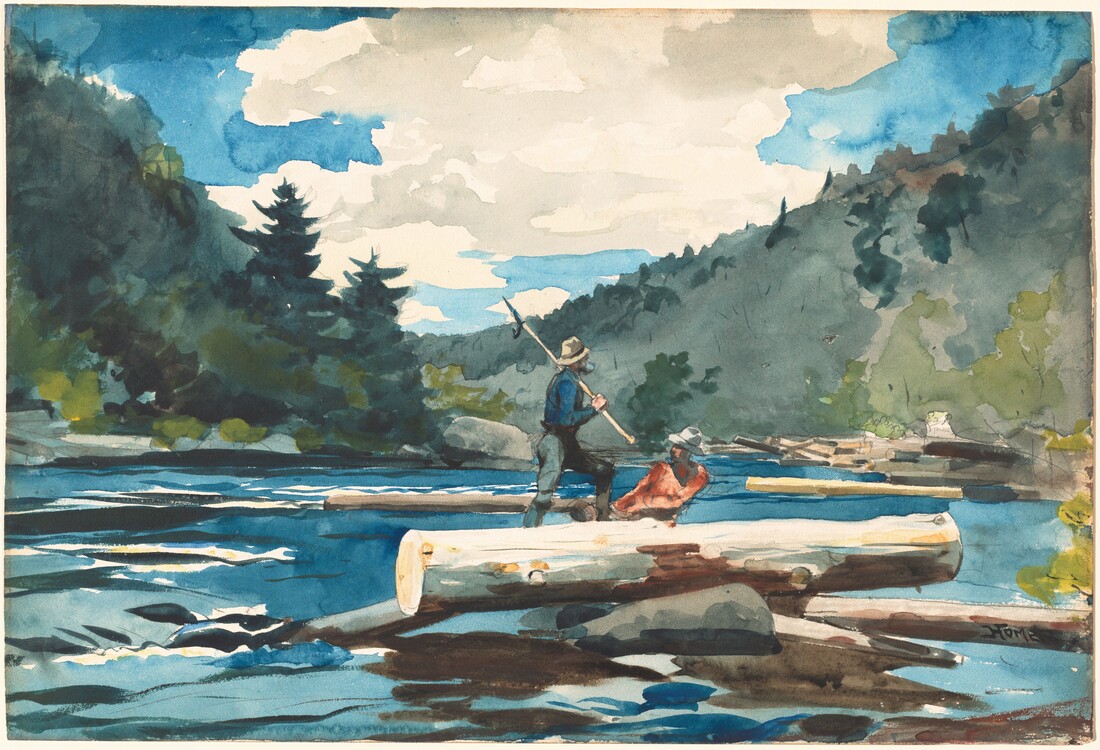 "Hudson River Logging" 1891-1892, Winslow Homer, National Gallery, Washington DC. I hope you enjoyed this lesson. You can find more of my free art lessons on this site HERE.
To stay up to date with all my free lesson plans and personal artwork, be sure to follow me on INSTAGRAM Disclaimer: The watercolor lesson plan provided in this blog article is intended solely for educational purposes. It is freely available for use and reproduction by students and teachers, with the aim of enhancing learning and creativity. However, please be advised that this lesson plan is not intended for commercial purposes or for resale in any form. Any unauthorized commercial use, reproduction for profit, or distribution for financial gain is strictly prohibited. The content and materials within the lesson plan remain the intellectual property of the author and should be used in accordance with ethical and educational guidelines. By using this lesson plan, you acknowledge and agree to adhere to these terms and conditions.
0 Comments
Your comment will be posted after it is approved.
Leave a Reply. |

Bruce and Marla at Garth Brooks Concert!
Author: Bruce BlackWelcome to Artful Academia: Categories
All
Archives
May 2024
|
 RSS Feed