Artful Academia
The musings of a landscape painter, art teacher, and art history lover
 Here is a great painting lesson for your high school art students. This lesson reinforces drawing skills related to realism, with an emphasis on proportion and form. Furthermore, it teaches students to paint using old master techniques involving an underpainting and color matching. One of the hardest things for art students is the act of matching value to color. For this project, students first create an underpainting using only black, white, and gray tones. This helps them to see the values. Next, they use a color copy to match colors. They must place their mixed colors directly on the color copy to examine the value and chroma. Most students are surprised to see how far off they are with their values. 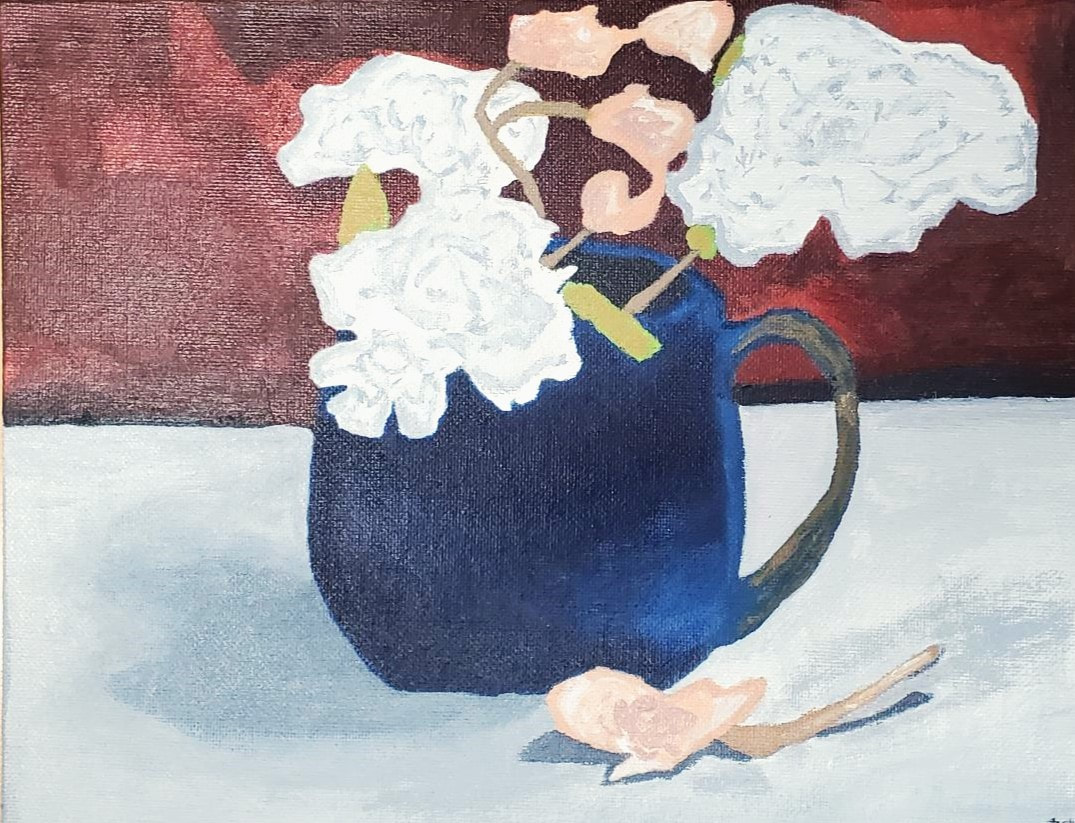
Student supplies: Each student will need an 8”X10” canvas panel or other painting surface. I also encourage my students to purchase their brushes, but I do supply brushes to everyone.
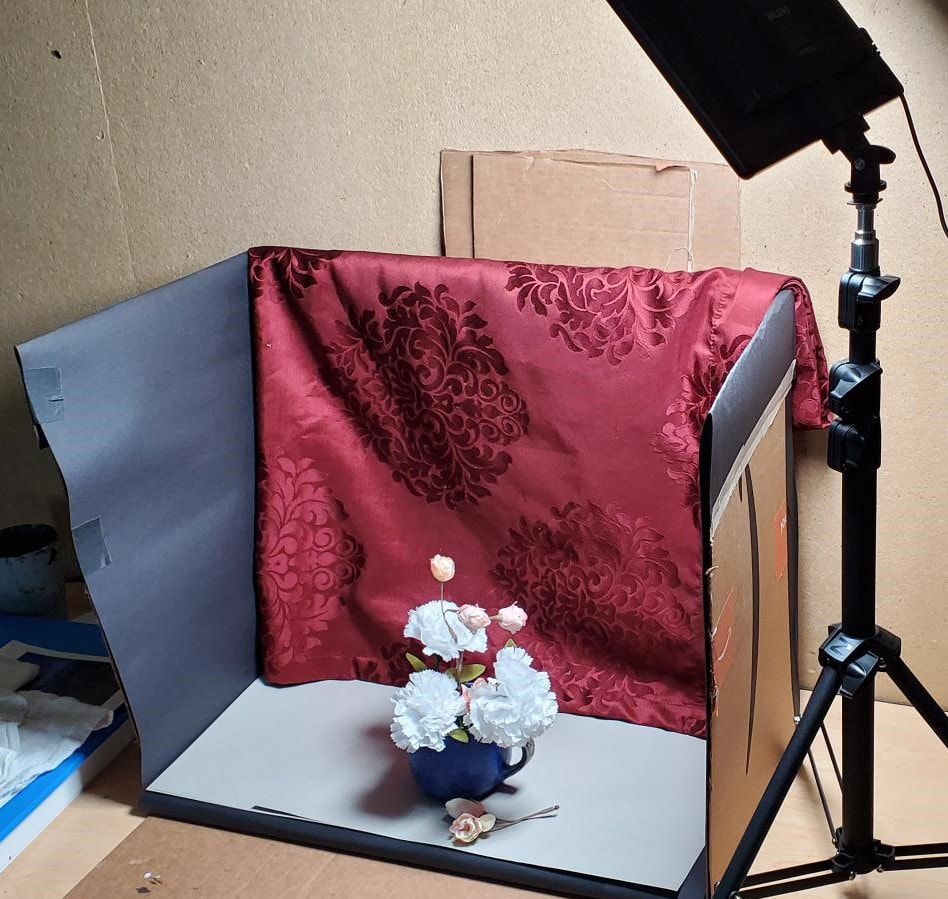
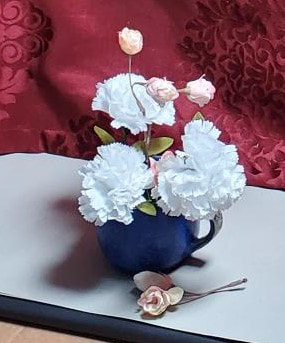
Class supplies: Acrylic paints, synthetic brushes, cups for water, paper towels, plastic painting palettes or paper plates, still life objects, cleaning supplies. You will also need a drying rack for the paintings or other safe space for them to dry. Set up a shadow box: The first step is to set up a small still life in your room or studio. To do this, I created a simple shadow box by cutting out one side of a large cardboard box and placing black sheets of paper inside. You can also simply paint the interior walls black. I also set up some studio lights to create a direct source of light on the still life. Then I found a mug and some artificial flowers and created a still life within the shadow box. When setting up the still life, I am conscious of not making it too hard, but also making it difficult enough for all my students to be challenged. Throughout this project, even though my students work from color copies, I refer them to the actual still life to see tone and color more accurately. We begin the project with them gathered around the still life and discuss how the light is creating effects and showing form.
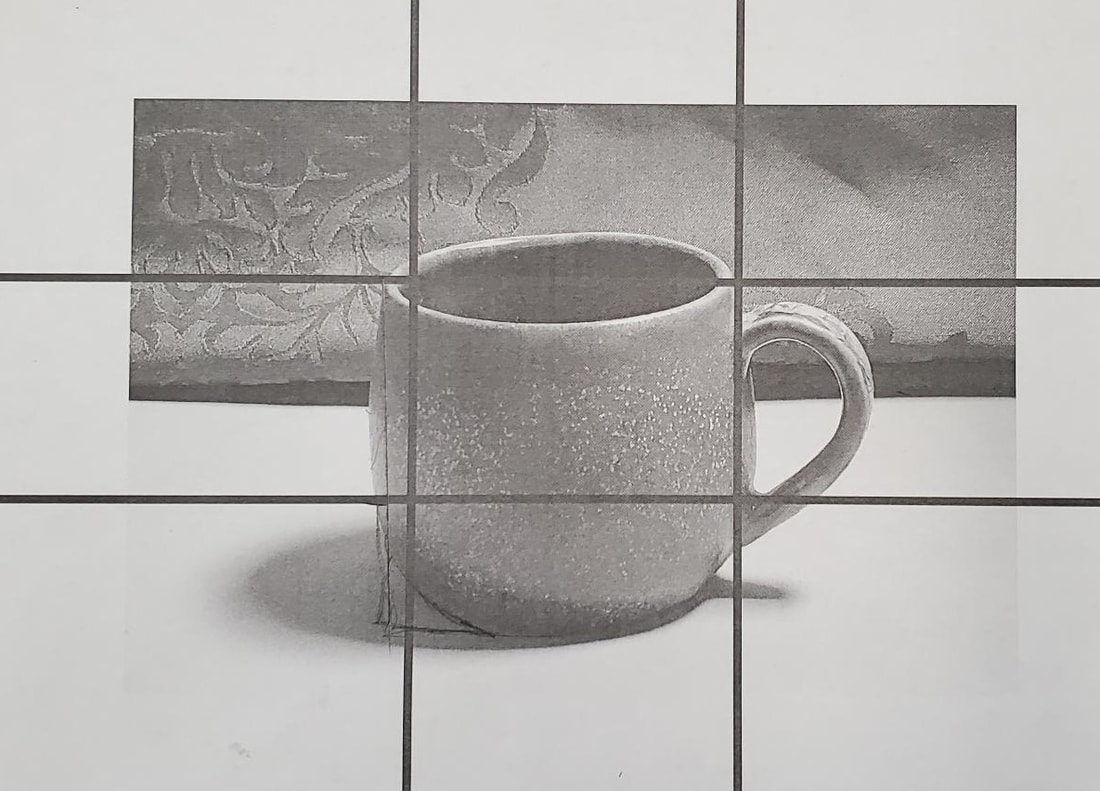
Drawing: For this painting, I set up a small blue mug with some fake flowers. I took a photograph of just the mug without the flowers and then made photocopies in black and white. Using the photocopy, the students work on drawing just the outline of the mug on their canvas. I have them take their time to get this drawing portion accurate. See the image below for instructions on drawing a cylinder and ellipse. Next, I have them draw in the flower shapes and instruct them to look at the overall negative space to determine if their shapes are interesting. 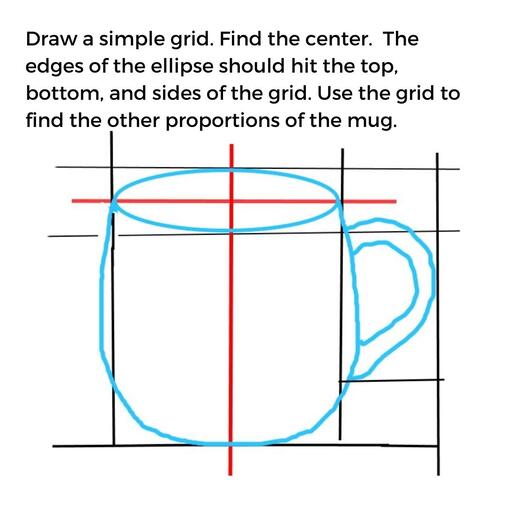 Draw a grid that loosely resembles the shape of your cylinder. Then, place elements in conjunction with the grid.
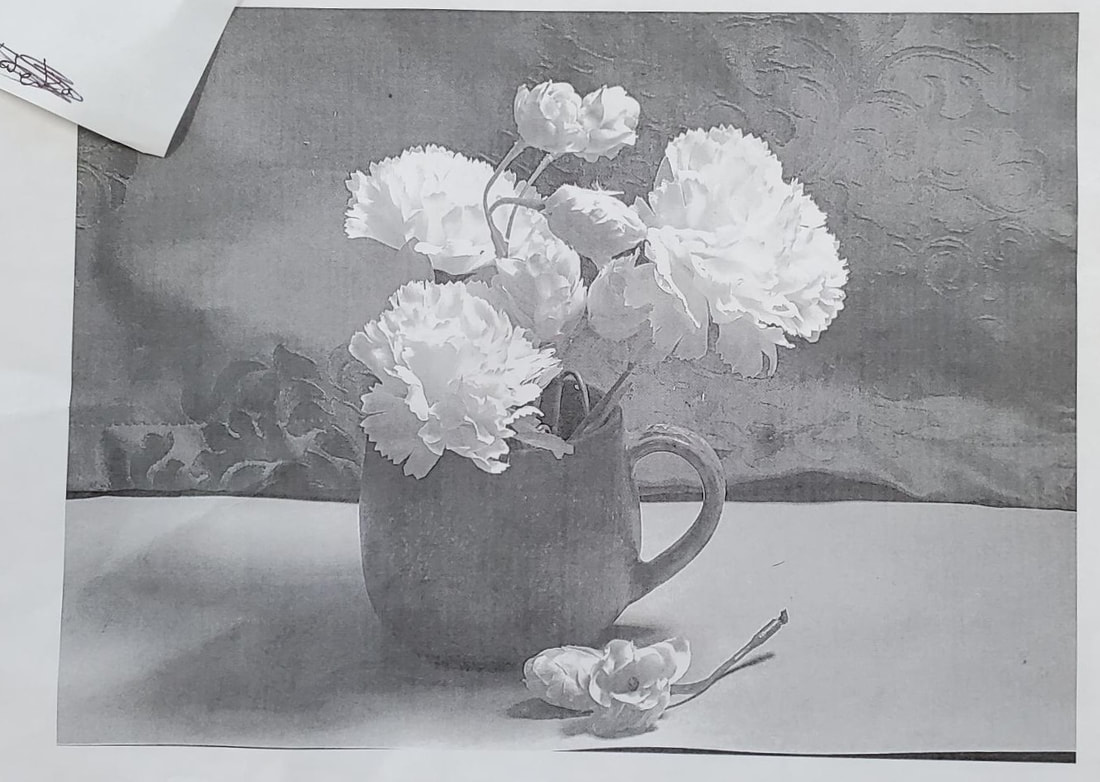
Underpainting: Underpainting has been used for a long time by painters. The idea is to establish the composition and values without color. Judging value in color is a challenge, and you can help your painting skills significantly if you will first create an underpainting. Then, as you add color, you are simply judging the value of the color against the value that you have already established with your underpainting. In order to help students see the values, I took a photo of the still life and reduced it down to a black and white image with only three or four values. I used Photoshop to do this, but you can also use Picasa, a free photo editor. I then have the students create their underpainting focusing primarily on value and shape. Some of them do some blending of the tones, but mostly I try to get them to create interesting shapes with accurate values. 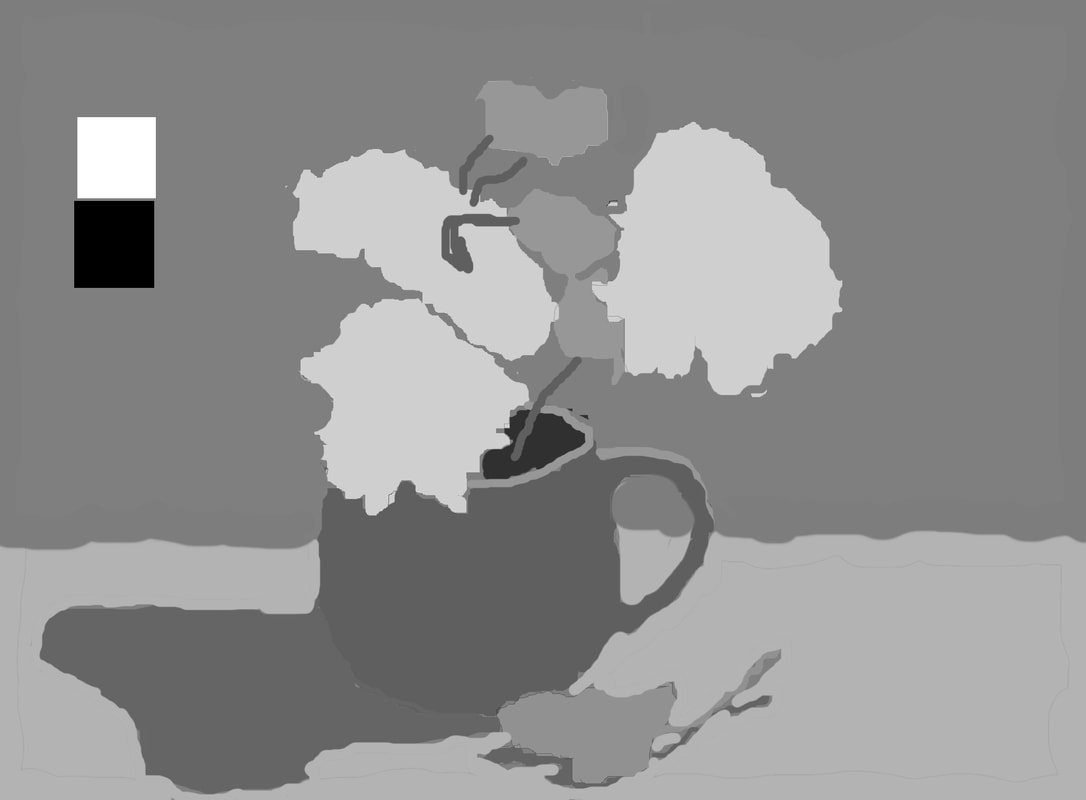 Photo reduced to 3 to 4 values to help students with their underpainting. I project this for the students in class. 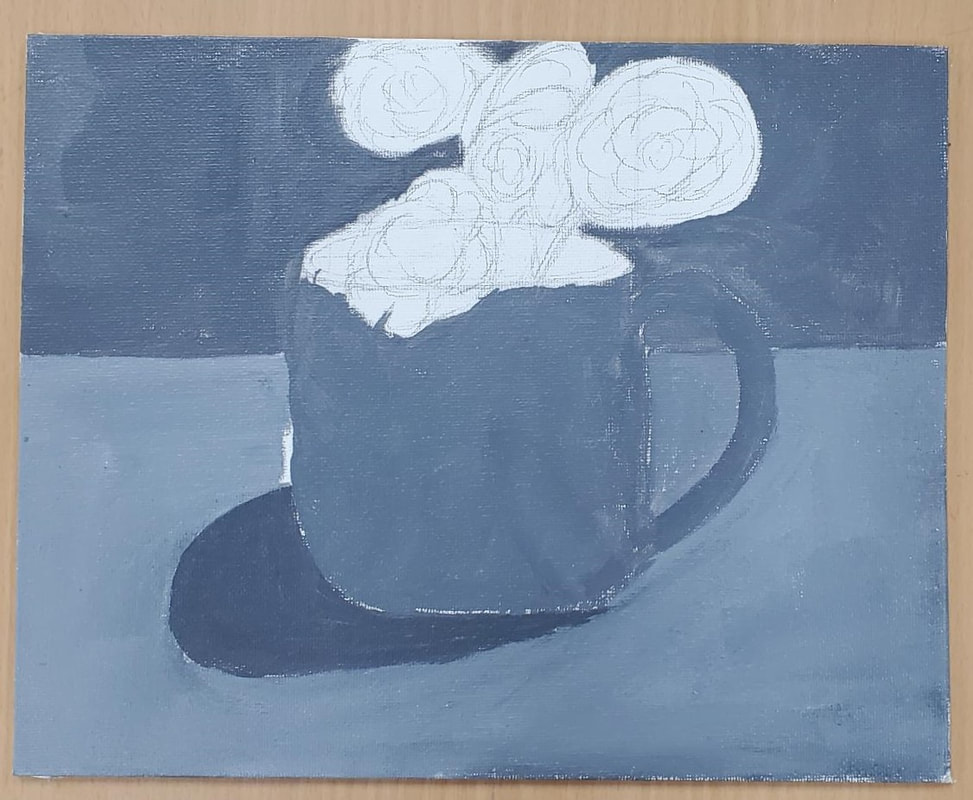 Student painting in progress. This shows the start of the underpainting. Painting: For the painting process, I have the students use acrylic paints. The brand I usually get for my students is the Dick Blick brand, Blickrylic. It is a student grade paint, but generally I find it to be well saturated with color and not too expensive. In my senior classes, I teach them oil painting techniques with water-soluble oil paints. I use the Cobra paints brand by Royal Talens. These paints require no toxic chemicals for cleaning or painting, and they wash up with soap and water. 1. Step one, color copies: I print out several good color copies of the still life and put them in protective plastic sleeves. Students mix the color of a given area and paint directly onto the plastic sleeve of the color copy. This way, they see if the color matches in value and chroma before they paint it on their canvas. Once they have the color correct, they need to wipe the paint off the sleeve. It takes a while for them to mix the paints and get them correct, and it is helpful if they have a plastic palette with a tight lid to save colors. 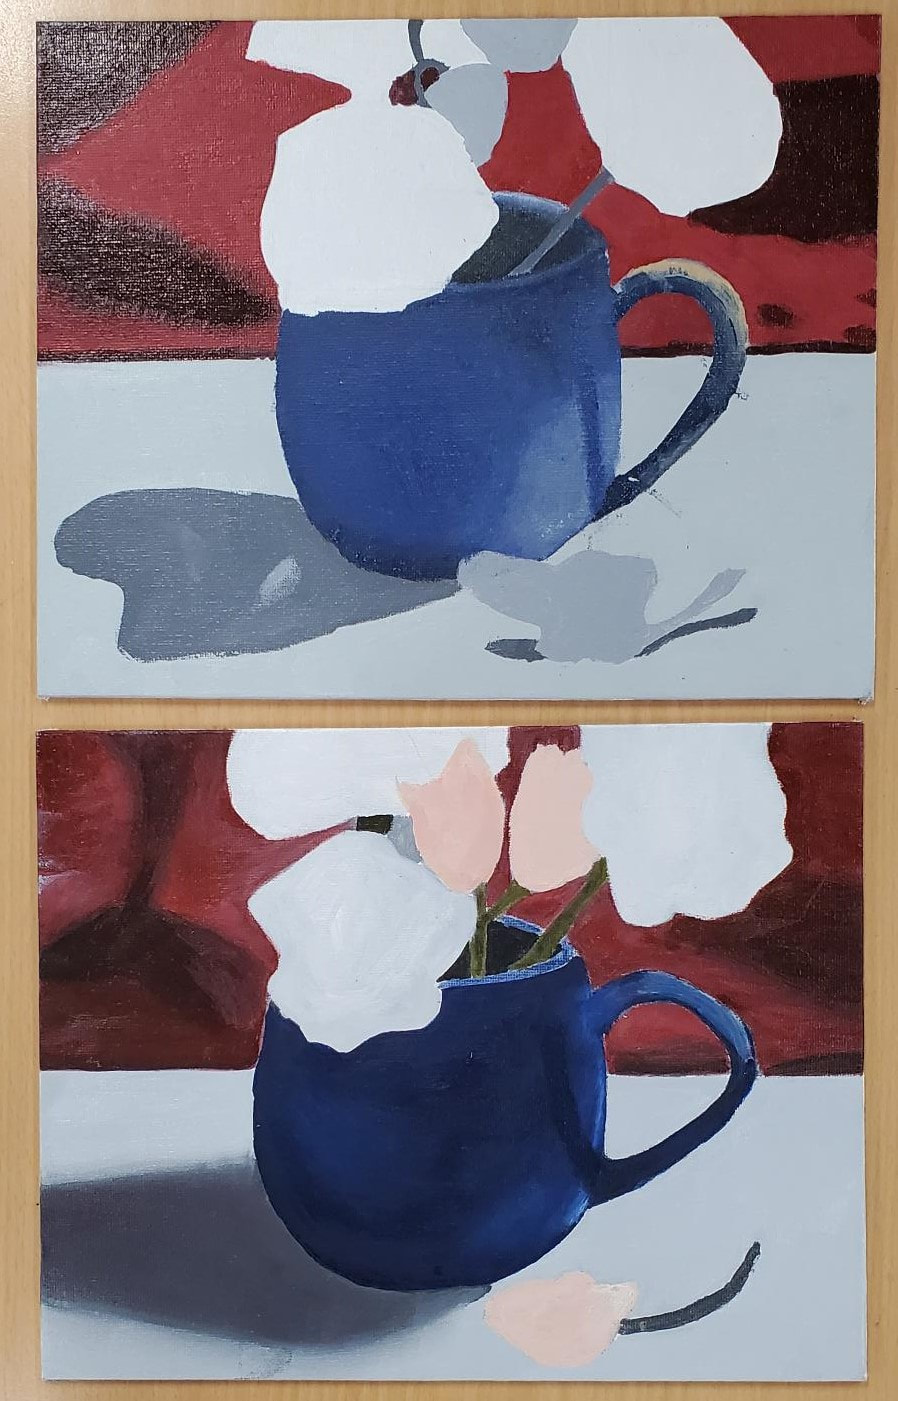 Student artwork in progress. 2. Step two, blocking in color: I have the students block in the main colors of each large shape. I try to get them to choose a color that is generally the value of the underpainting below and not a highlight or dark shadow tone. They must use the photocopies to check their colors. 3. Next, I have the students begin to paint the background. It is important to paint in the background first, because its color and tone will affect the rest of the painting. A note on blending: To blend two colors, it is helpful to mix both colors and place them side by side. While both are still wet, pull one color towards the other, wipe your brush and pull the other color back towards the first. Repeat as necessary. 4. At this point, I encourage students to work on developing the colors in the mug. 5. After the mug, concentrate on the foreground and any shadows cast by the still life onto the ground. A note on shadows: Shadows typically are somewhat lighter in value than the object casting the shadow. Also, they get lighter in value as they move away from the object. Finally, they have soft edges. That means blend them out until they start to dissolve into the object or plane they are being cast on. 6. Painting the flowers comes next. Paint in the shadow colors for your flowers. They should not be too dark or too light, somewhere in the middle of the value scale. Then, add the light colors on top, and finally the highlights. Be sure to keep the edges of your flowers irregular and interesting. Remember, having interesting shapes is more important than correct colors or even values. Caution: Do not make the stems too thick! If you find your stems getting too fat, do not worry. Just mix the background color again and paint into the stems. In this way, you can make them very thin. 7. The last step is to look at your painting and see if all the parts feel like they are in harmony. If they are, then clean up any drips or blemishes and you are done. A note on edges: In painting, you can create hard edges by having a precisely defined shape sitting against or on top of another shape. A sharp roofline in a painting would be an example. On the other hand, you can have soft edges as areas move into shadow. This also occurs if you are painting objects that recede into the distance, or simply are not as important as other areas. A hard edge will draw the viewer’s eye to it. A soft edge can make an area less significant than your focal point. Try thinking about where you want a hard edge vs. a soft edge. Troubleshooting: I have found that with this project, I have to do lots of demonstrating on students’ paintings. I will paint the area of one flower and then ask them to paint the others. I also carry a pad of paper around and demonstrate on the pad for them. Here are some areas where students have trouble:
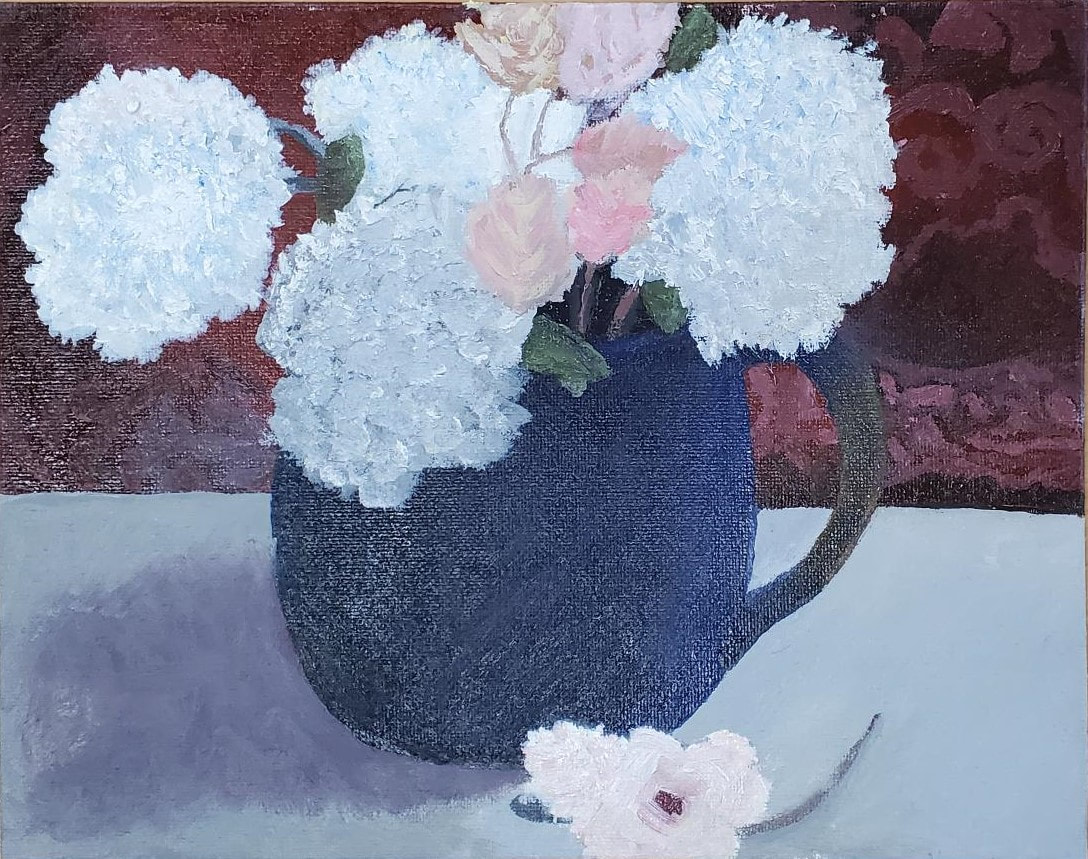
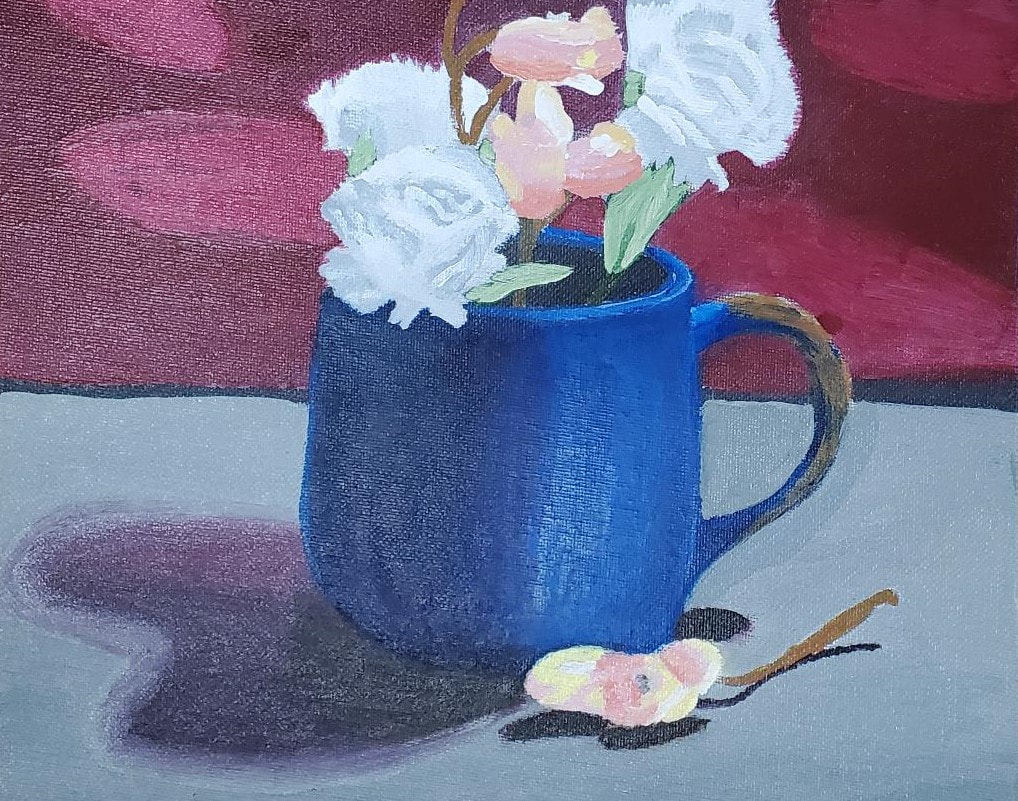
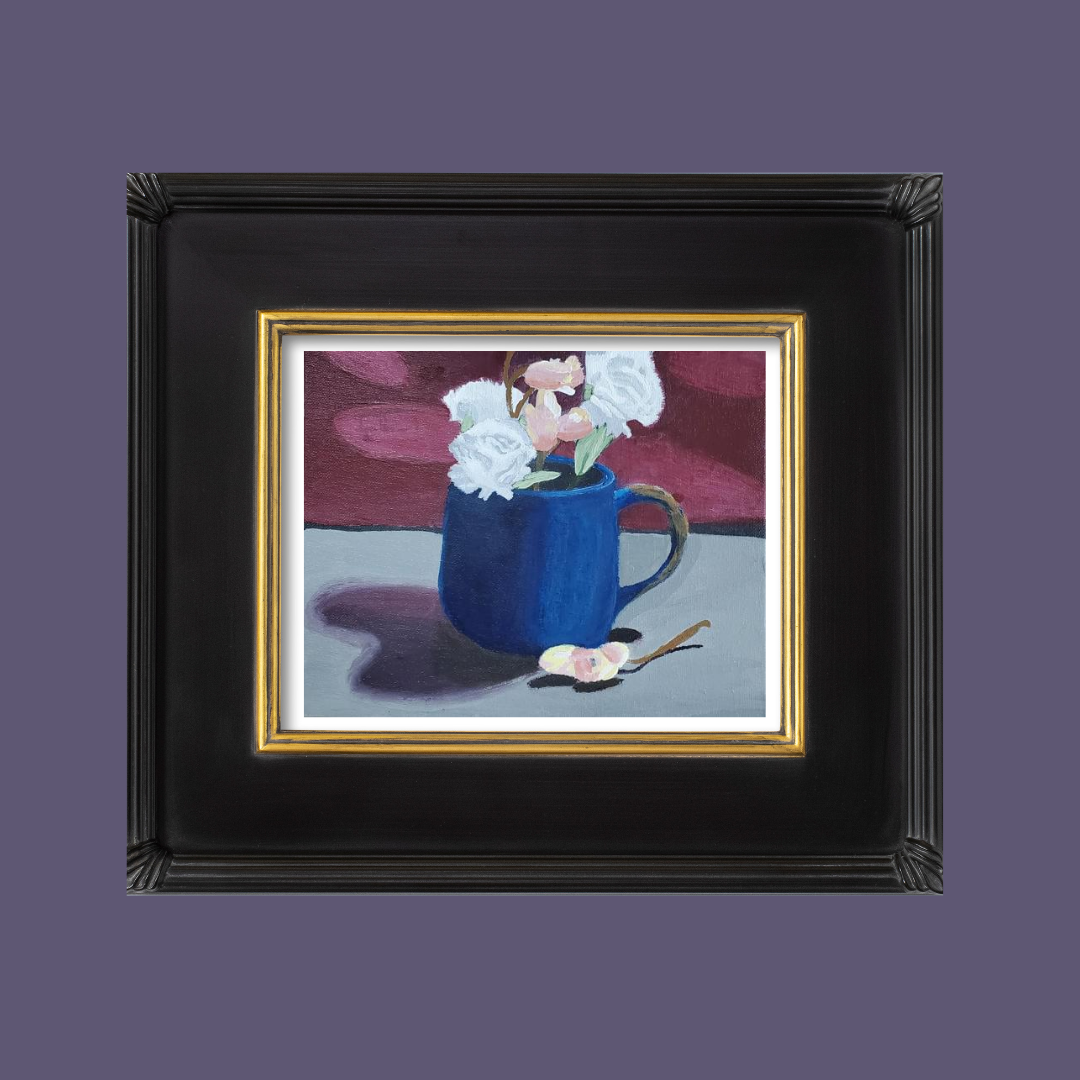 I added a frame to this student painting. I think it really shows off just how good it is! Further Research: The artist, Paul Foxton has a great series of YouTube videos on painting flower still lives. These are in depth advanced discussions, but they can be very helpful for students and art teachers. I have no affiliation with him, I just love his videos. You can find him HERE. This article is written for art teachers, art students, and art lovers. I offer this content free of charge and hope that it may be helpful in improving your art skills or those of your art students. More great art lessons for middle school and high school students can be found on this website HERE. Please consider following me on Instagram @bruceblackart.
0 Comments
Your comment will be posted after it is approved.
Leave a Reply. |

Bruce and Marla at Garth Brooks Concert!
Author: Bruce BlackWelcome to Artful Academia: Categories
All
Archives
May 2024
|
 RSS Feed