BRUCE BLACK ART: OIL PAINTINGS, STILL LIFES & ART EDUCATION
  • Home
  • Artwork
  • Contact
  • Blog
  • About
  • Art Education

Artful Academia

The musings of an artist, art teacher, and art history lover

2 Point Perspective Drawing Tutorial

1/5/2022

0 Comments

 
House in 2 point perspective
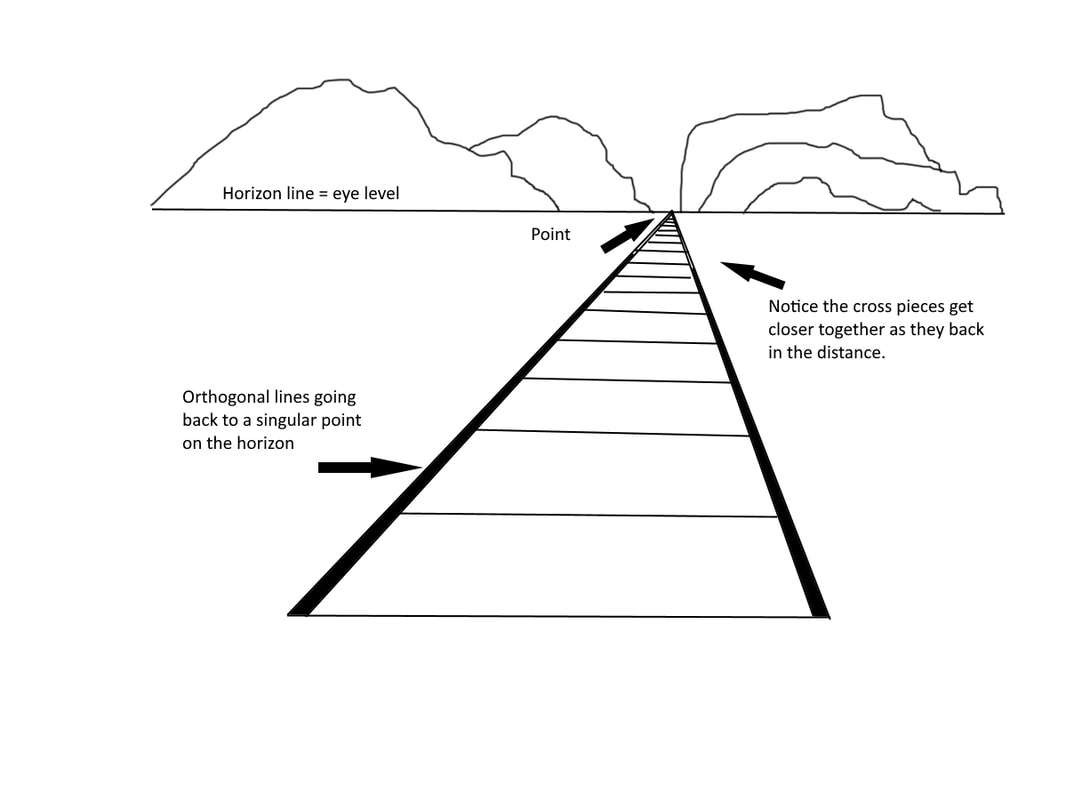
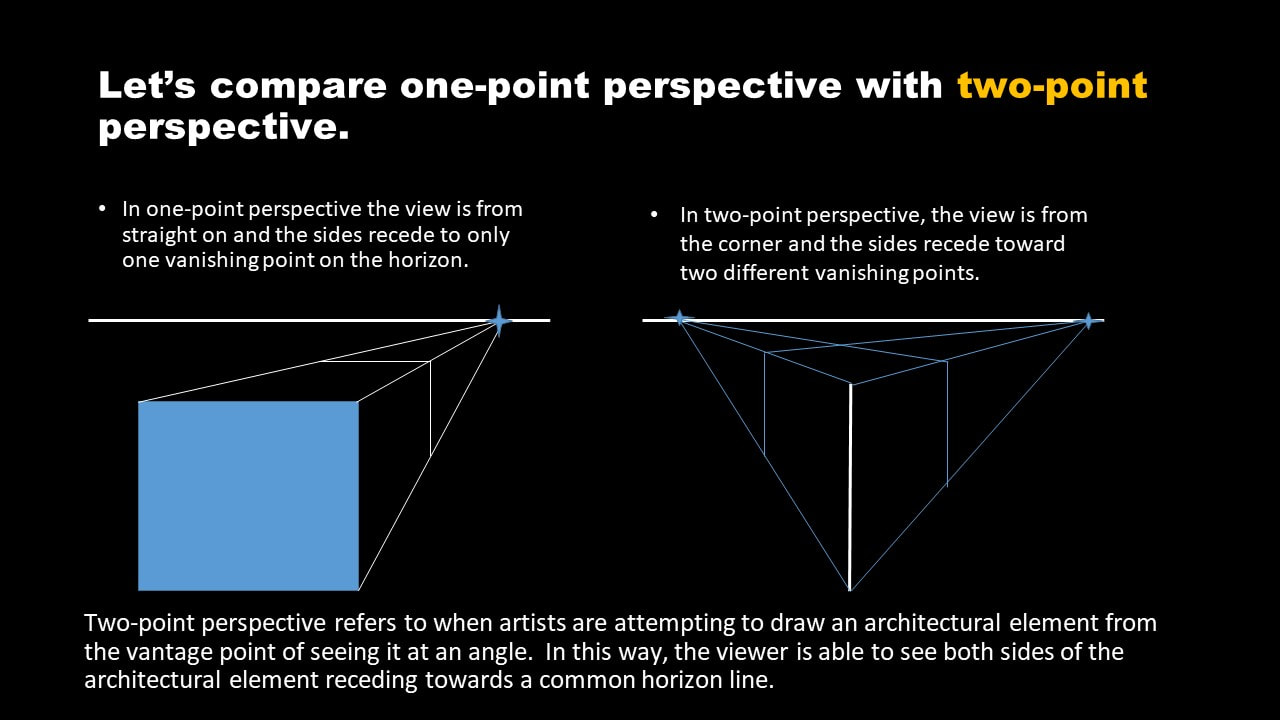
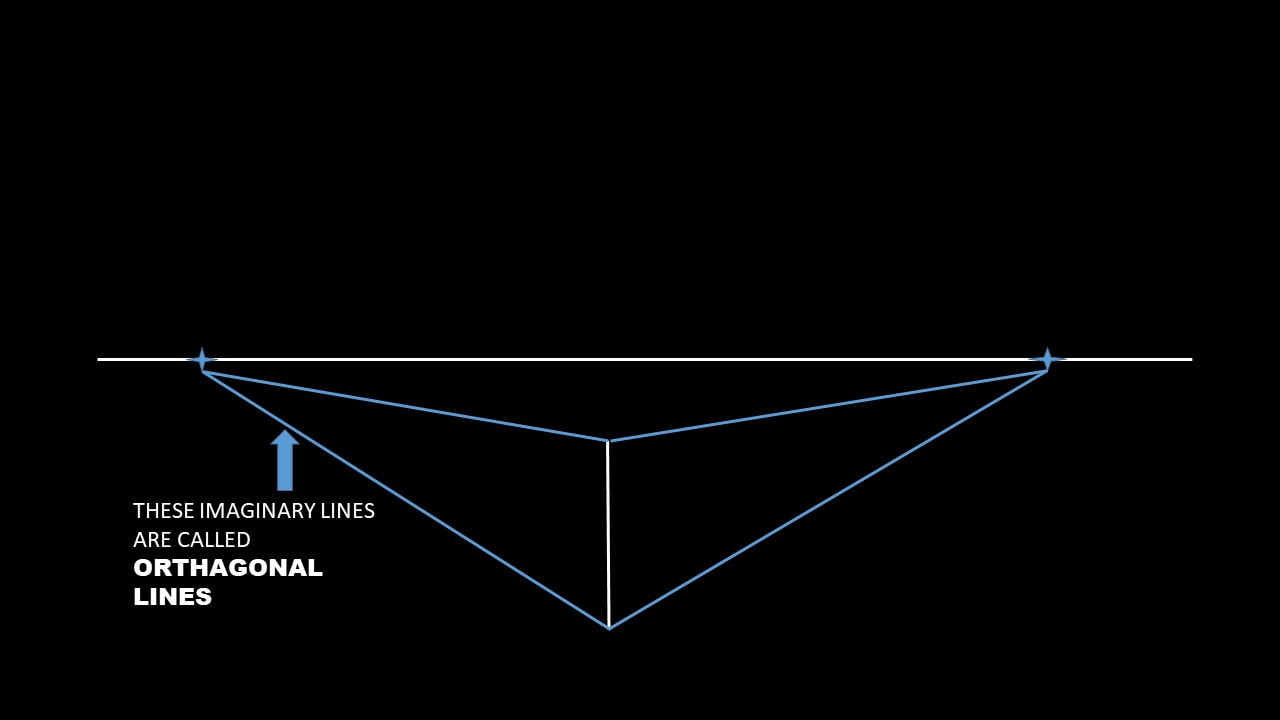
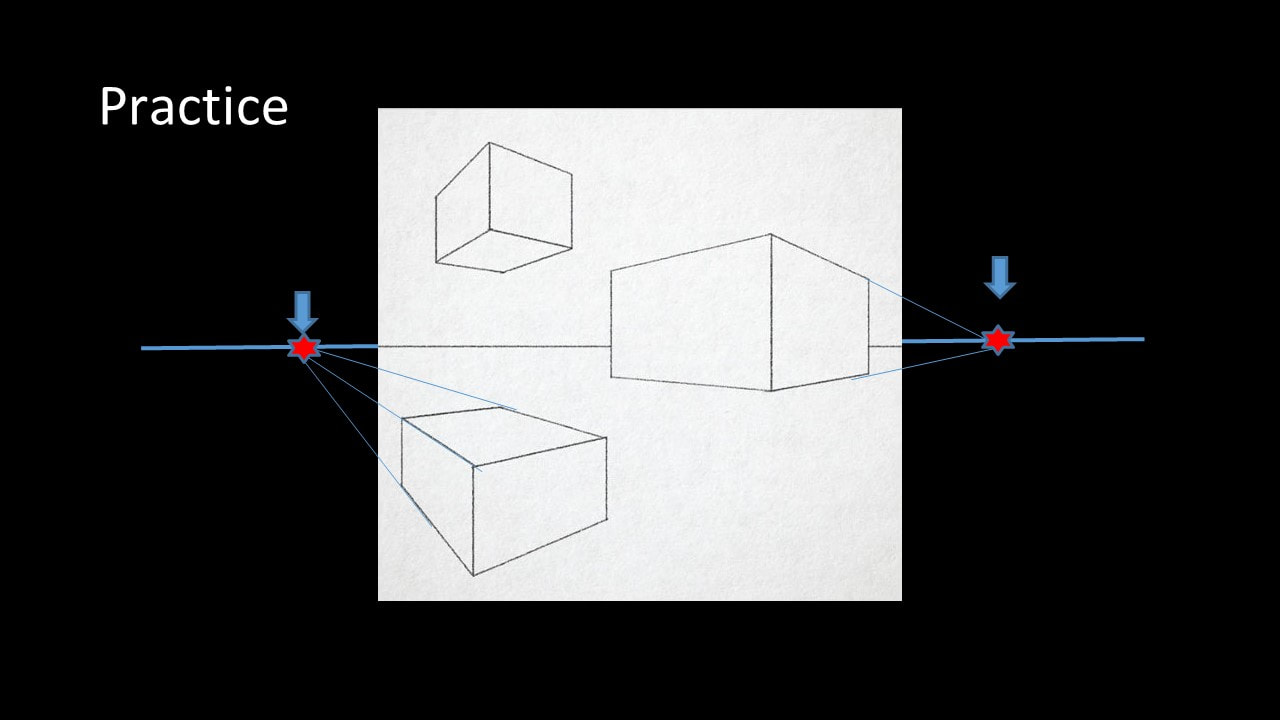
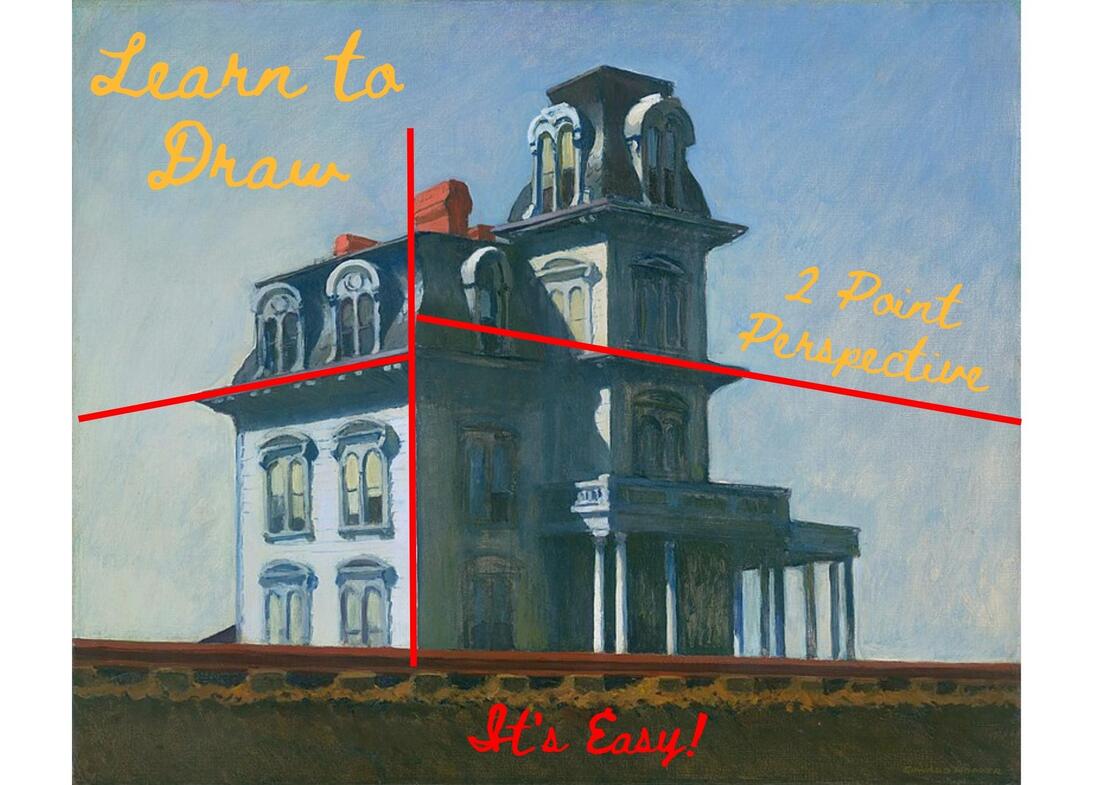
Learning to draw in two-point perspective is easy and fun! With just a little bit of practice, you can draw amazing houses, buildings, and cities in perspective.  This 2 point perspective tutorial can also help you to draw everyday objects.  Once you understand how orthogonal lines recede into the distance and where to put your points on the horizon line, you will be able to draw amazing things. Let’s get started!

What is perspective in art? ​

In art, perspective is a technique for creating the illusion of three-dimensional space on a two-dimensional surface. It involves using various methods to represent how objects appear to the eye as they recede into the distance. There are several types of perspective, including linear perspective, atmospheric perspective, and isometric perspective, each with its own set of rules and techniques. Perspective is an essential tool in art that allows artists to create realistic and convincing representations of the world around us.
Perspective drawing design
Perspective in art diagram
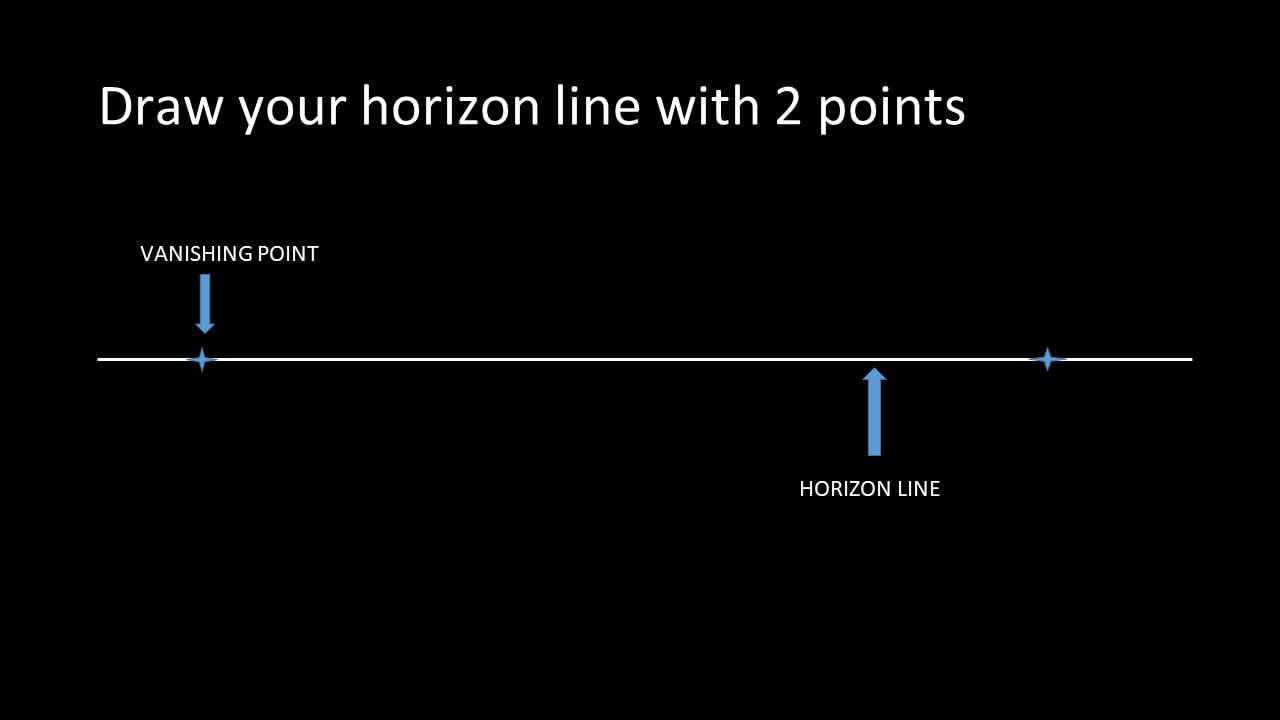
There are just a couple of things to keep in mind before you begin your two-point perspective drawing. 
  1. The horizon line is not only the part of the landscape where the sky meets the land, it also represents the eye level of the viewer.  Objects that are drawn above the horizon line are seen as being above eye level, requiring the viewer to look up.  Objects below the horizon line are seen as being below eye level and requiring the viewer to look down. 
  2. Orthogonal lines are imaginary lines that recede to the horizon line to specific points.  Your orthogonal lines and points must go on your horizon line.  See the example of train tracks below.  The train tracks were drawn in one-point perspective with the orthogonal lines all receding to that singular point on the horizon. 
one point perspective diagram

Supplies: Paper, ruler, pencil, eraser, good attitude.
Free Download: How to Draw in Two Point Perspective Like a Pro!
File Size: 4114 kb
File Type: pptx
Download File


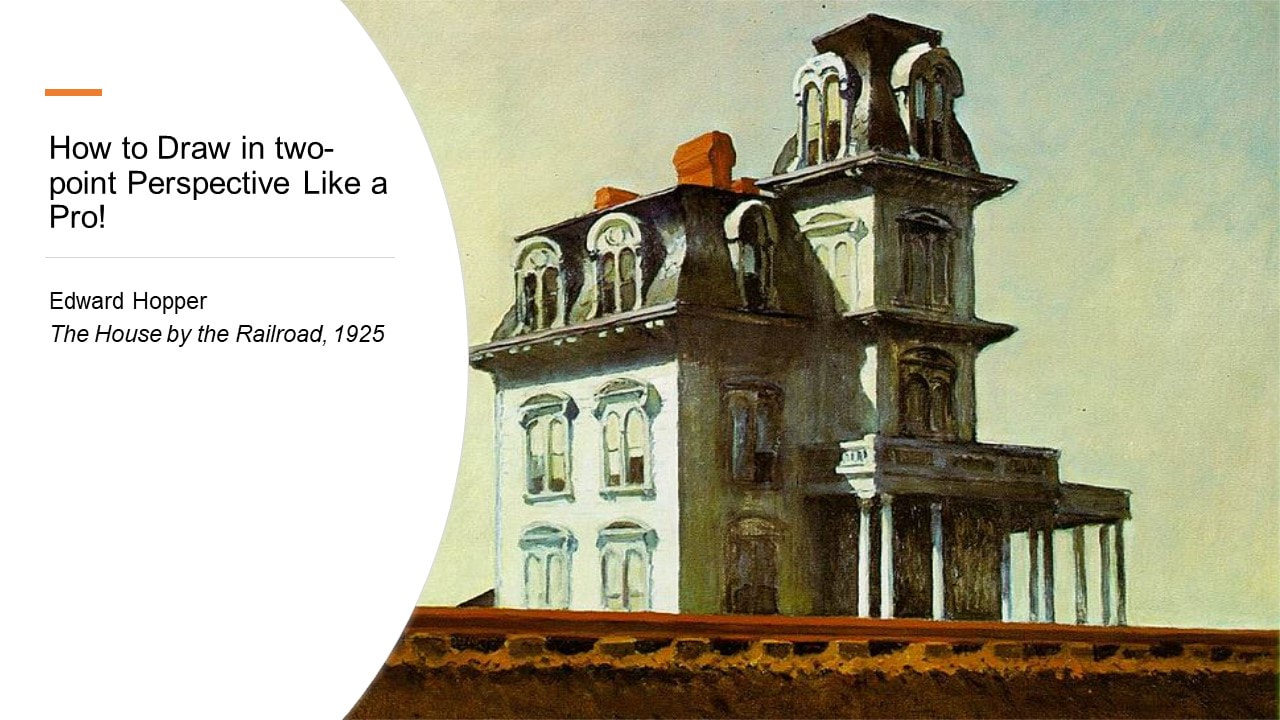
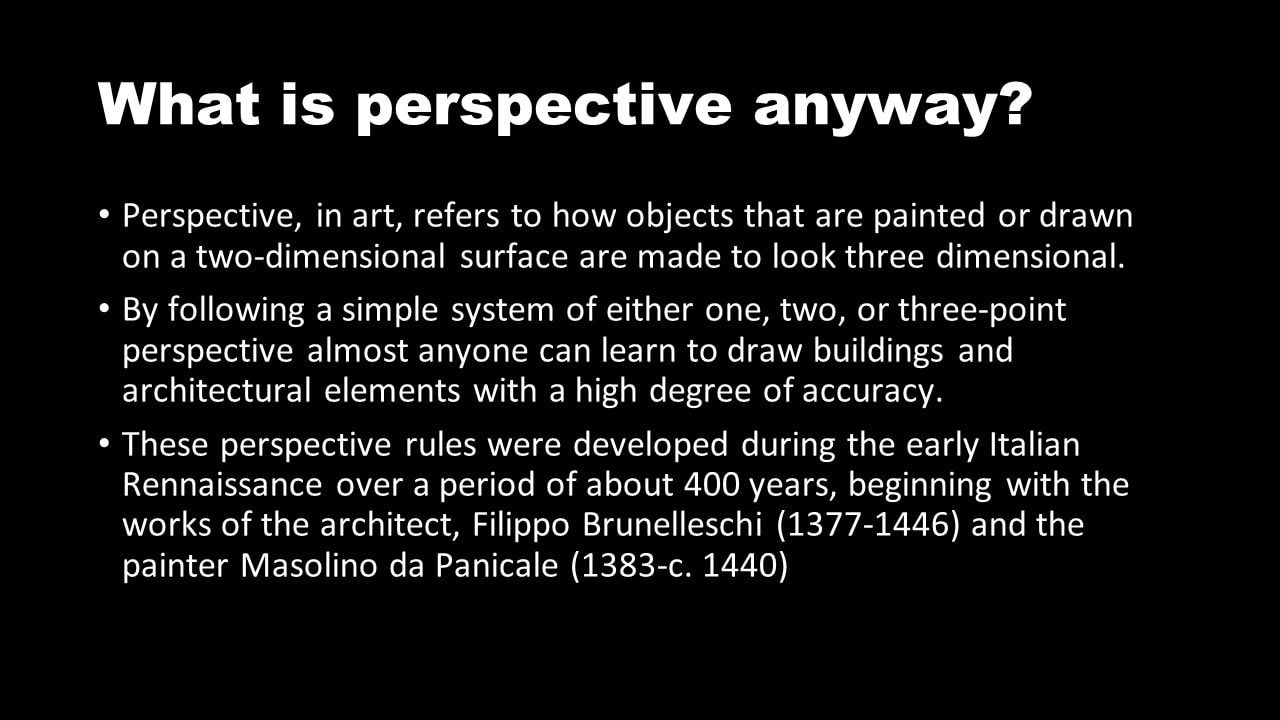
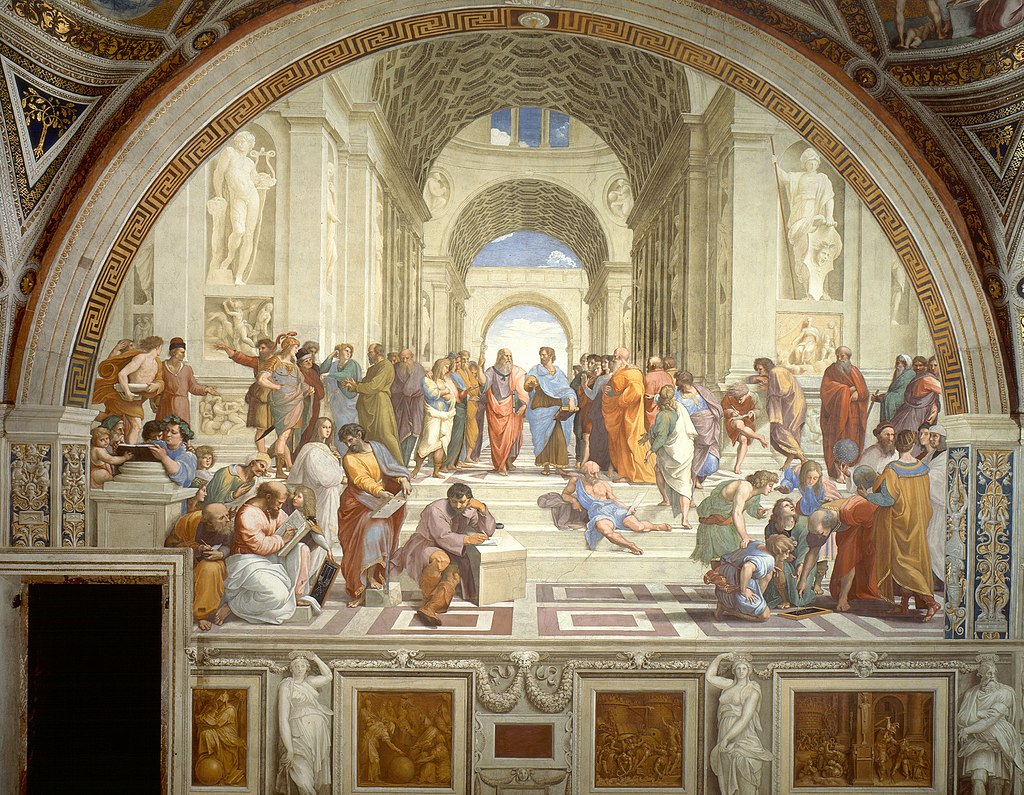
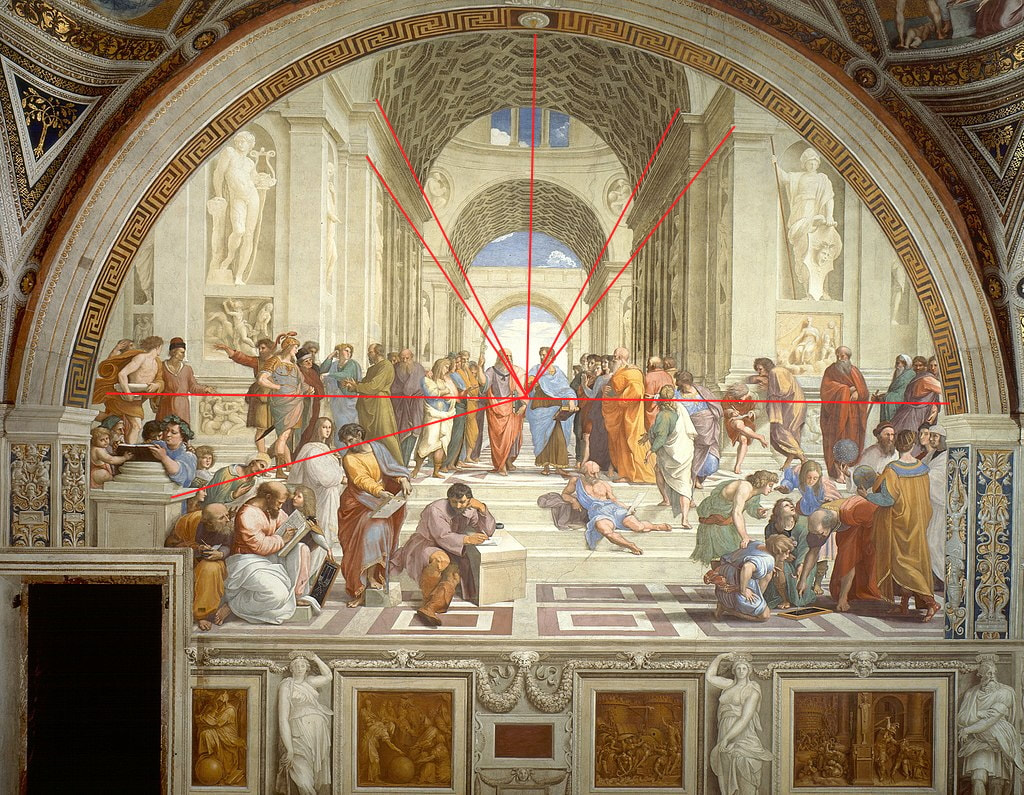
Follow this easy tutorial on 2 point perspective​

Drawing tutorial title page: photo of Edward Hopper house.
What is Perspective?
The difference between 1 and 2 point perspective
Steps for drawing in perspective
Draw a horizon line with two points on it.
Draw orthogonal lines to your points on the horizon line.
Drawing the top part of your 2 point building.
Finished drawing with orthogonal lines.
Erase your extra lines and clean up your 2-point drawing.
Diagram of a cube drawing in perspective.
Boxes drawn in perspective.

The History of Linear Perspective 

The concept of perspective in art has evolved over time, and its significance became more pronounced during the Italian Renaissance. However, prior to this artistic revolution, during the dark ages, the knowledge of perspective seemed to have been lost or neglected. It was not until the architect Filippo Brunelleschi's pioneering work that the mathematical system of linear perspective was rediscovered.

Before the Renaissance, artists often depicted imagery without strict adherence to actual reality or perspective. In paintings, figures were often sized based on their importance rather than their spatial relationships. For example, in Giotto di Bondone's iconic artwork "Madonna Enthroned," the figure of Madonna is much larger than the other figures, not because of perspective, but due to her significance. A similar approach can be observed in Ancient Egyptian paintings, where figures were sized based on hierarchy, and spatial concerns were not given much consideration.

In Ancient Egyptian art, hieroglyphic paintings were divided into different levels, and the same method of sizing figures based on importance was applied. Additionally, both in "Madonna Enthroned" and Ancient Egyptian paintings, there is a lack of a distinct sense of distance behind the figures, indicating that perspective was not a priority in pre-Renaissance art.

However, during the Italian Renaissance, the rediscovery of linear perspective by Brunelleschi brought about a paradigm shift in how artists approached the depiction of space and reality in their works. The use of vanishing points, converging lines, and accurate scaling of objects based on spatial relationships became crucial in achieving a realistic representation of three-dimensional space on a two-dimensional surface. This newfound understanding of perspective revolutionized art, allowing artists to create more lifelike and convincing representations of the world around them.
Ancient Egyptian Art painting with figures.
Ancient Egyptian Art
Painting of Modona and child with apostles and angels.
Giotto di Bondone, c. 1310, Uffizi Gallery, Florence
Compare the above images to the Renaissance painting, The School of Athens (1509-1511) by Raphael, below. In this painting, you can see a dominant architectural aspect to the background with orthogonal lines going back to a single point.  The use of linear perspective gives the painting a sense of depth and atmosphere unseen in prior times. See the images below with examples of The School of Athens with orghogonal lines indicated. 
Raphael painting of people on steps.
School of Athens by Raphael, 1509–1511. Example of Renaissance perspective.
Diagram showing the perspective of Raphael painting.
School of Athens by Raphael, 1509-1511. Example with orthogonal lines.
Now that you understand two-point perspective, just imagine all the things you can draw! Quite literally, the sky is the limit! Have fun and make lots of drawings.  The best way to become a good artist is to make lots of art. 

Art Teachers ​Lesson Plan: Two-Point Perspective Drawing of a Building

Objective: The objective of this art lesson is to introduce middle school students to the concept of two-point perspective and to develop their skills in drawing architectural elements such as windows, doors, and other details in a building. Students will learn how to use two-point perspective to create a realistic and visually appealing drawing of a building with accurate proportions and perspective.
Supplies:
  • Drawing paper (11x14 inches or larger)
  • Pencils (HB or 2B)
  • Rulers (preferably with clear edges)
  • Erasers (both kneaded and regular)
  • Optional: Colored pencils or markers for adding color to the final drawing
Directions:
  1. Introduction (5 minutes):
  • Begin the lesson by discussing the concept of perspective with students. Explain that perspective is a way of drawing or painting objects in a way that creates the illusion of depth and space on a two-dimensional surface.
  • Show examples of two-point perspective drawings of buildings, emphasizing the vanishing points, horizon line, and converging lines that are characteristic of this type of perspective.
  1. Demonstration (15 minutes):
  • Demonstrate how to create a two-point perspective drawing step by step. Start with drawing a horizon line across the middle of the paper using a ruler. This line represents the viewer's eye level and should be straight and horizontal.
  • Next, explain that the two vanishing points represent the points where parallel lines in the building will converge. Place the vanishing points on the horizon line, at equal distances from the center of the paper.
  • Using a ruler, draw lines from each corner of the building towards the vanishing points. These lines represent the edges of the building that recede into the distance. These are called the "converging lines".
  • Add lines for the sides, top, and bottom of the building, making sure they all converge towards the vanishing points. This will create the basic structure of the building in two-point perspective.
  • Demonstrate how to add windows, doors, and other architectural details to the building using the same perspective principles. Show students how to use their rulers to create straight lines and accurate proportions. Encourage them to be creative and add their own unique details to the building.
  1. Practice (30 minutes):
  • Have students begin their own two-point perspective drawings of a building on their drawing paper. Remind them to use the horizon line, vanishing points, and converging lines to create a realistic and visually appealing drawing.
  • Circulate around the classroom to provide individual guidance and feedback to students as they work on their drawings. Encourage them to experiment with different architectural elements and to pay attention to the details such as windows, doors, and textures.
  • Remind students to use their rulers to create straight lines and accurate proportions, and to erase any unnecessary lines or mistakes along the way.
  1. Closure (5 minutes):
  • Have students reflect on their drawings and share their thoughts with the class. Ask them to discuss what they learned about two-point perspective and how it influenced their drawings.
  • Display completed drawings around the classroom or in a gallery-style format to showcase students' work.
  • Optional: If time allows, students can add color to their drawings using colored pencils or markers, or they can create a background or surroundings for their building to enhance the overall composition.
Assessment:
  • Assess students' drawings based on their accuracy in using two-point perspective, their attention to architectural details, and their creativity in adding unique elements to their building.
  • Provide feedback to students on their use of perspective, proportions, and attention to details, and offer suggestions for improvement if needed.
  • Use a rubric or checklist to assess students' work based on the lesson objective and criteria discussed in class.
Extension Activities:
  1. Research and Present: Have students research famous buildings from around the world that are known for their unique architectural elements. They can create a presentation or a poster showcasing their findings, including drawings or photographs of the buildings, and describing the architectural features that make them noteworthy.
  2. Outdoor Sketching: Take students outside to observe and sketch buildings in their local environment. Encourage them to apply their knowledge of two-point perspective to capture the buildings' proportions, details, and perspective in their sketches. This can provide a hands-on experience and help students understand how perspective works in real-life settings.
  3. Collaborative Mural: Divide the class into small groups and assign each group a section of a large paper or wall space. Have them work together to create a collaborative mural of a cityscape or a fictional building using two-point perspective. This can be a fun and creative way for students to apply their skills in a larger-scale project.
  4. Architectural Design Challenge: Challenge students to design their own unique building using two-point perspective. They can sketch their designs on paper, create 3D models, or use digital tools to visualize their ideas. Encourage them to think creatively and consider different architectural styles, functions, and materials in their designs.
  5. Art History Connection: Integrate art history into the lesson by discussing famous artists who have used two-point perspective in their works, such as Canaletto, Piranesi, or Hopper. Show examples of their artworks and discuss how they used perspective to create depth and space in their compositions. This can help students make connections between the lesson's content and the broader context of art history.
By incorporating these extension activities, you can further engage students and deepen their understanding of two-point perspective and architectural elements in art.

Modern building in 2 point perspective
Old building in two point perspective
Complicated drawing in two-point perspective
Old wooden building two point perspective.
This presentation is for art educational purposes and is free to use and download.  If you liked this tutorial, you may also like to check out drawing in three-point perspective HERE.
How to Draw in 3 Point Perspective
Follow Me: Instagram
0 Comments

Your comment will be posted after it is approved.


Leave a Reply.

    Picture
    Bruce and Marla at Garth Brooks Concert!

    Author: Bruce Black

    Welcome to Artful Academia:  
    Welcome to my blog, where I celebrate the joy of creative living and the beauty of the arts! As a professional landscape painter and experienced middle school and high school art teacher, I'm passionate about sharing my artistic journey with you. Here, you'll find a treasure trove of my own artwork, insightful art history lessons, engaging art projects, and motivating tips to inspire and support you on your own creative path. Join me as we embark on a journey of artistic exploration and inspiration together!

    Sign Up

    Categories

    All
    Abstract Art
    Art History
    Art Projects
    Being Creative
    Creative Journal Project
    Landscape Paintings
    Realism
    Still Life Painting

    Archives

    April 2025
    February 2025
    November 2024
    October 2024
    September 2024
    May 2024
    March 2024
    January 2024
    December 2023
    November 2023
    October 2023
    September 2023
    July 2023
    June 2023
    May 2023
    April 2023
    March 2023
    February 2023
    January 2023
    December 2022
    November 2022
    October 2022
    September 2022
    August 2022
    February 2022
    January 2022
    December 2021
    February 2021
    September 2020
    June 2020
    April 2020
    March 2020
    October 2019
    September 2019
    October 2018
    September 2018
    March 2018
    January 2018
    December 2017
    November 2017

    RSS Feed

Follow us on Social Media

Contact Bruce Black Art
Terms of Service 
​Refund Policy and 30 Day Guarantee  

  • Home
  • Artwork
  • Contact
  • Blog
  • About
  • Art Education