
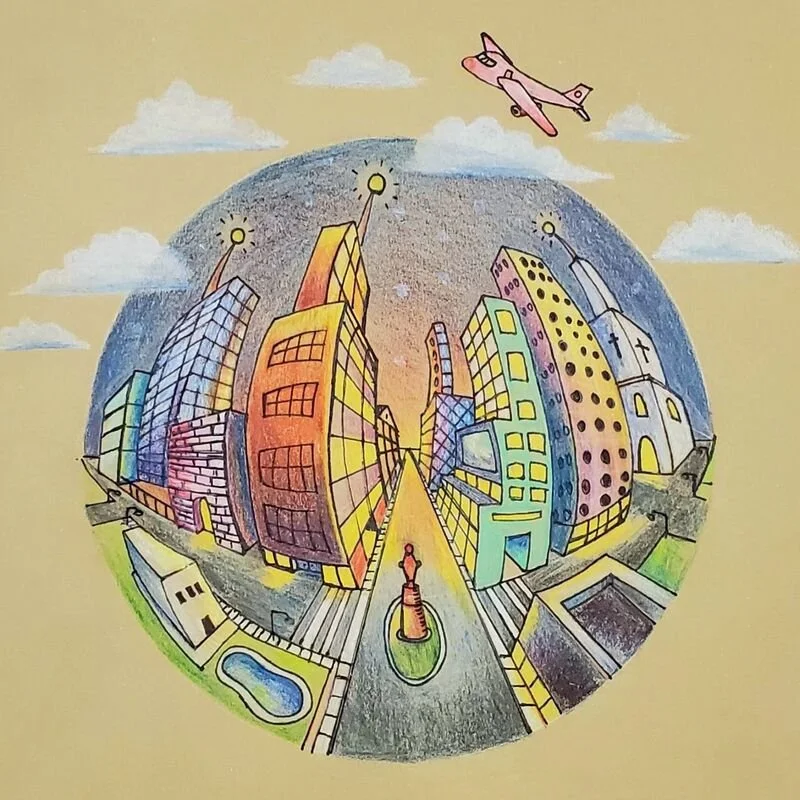
Learning to draw in five point perspective is so much fun!
The Supply List
To get started, you only need a few basic studio materials:
A standard pencil and a good eraser
A ruler (for your initial axes and center-point depth lines)
A Sharpie marker (fine or ultra-fine point)
Colored pencils
The Three Rules of 5-Point Perspective
Before we draw, remember these three architectural rules for your cityscape:
All vertical lines (the height of your skyscrapers) must curve to follow the top or bottom vanishing points.
All horizontal lines (the width of the buildings) must curve to follow the left or right vanishing points.
All lines showing depth (the roads, alleys, and sides of buildings going away from you) go straight to the center vanishing point.
You can click through the slideshow presentation embedded above for a visual breakdown of my classroom examples, and follow these steps to create your own:
1.Draw the Globe and Axes:
Lightly draw a large, perfect circle on your paper. Use your ruler to draw a straight vertical line (the Y-axis) and a straight horizontal line (the X-axis) intersecting exactly in the center of the circle. The four points where these lines touch the circle edge, plus the exact center intersection, are your five vanishing points.
2.Map the Orthogonal Guidelines:
Using your pencil, draw a series of curving lines (arcs) connecting the top vanishing point to the bottom vanishing point, bowing outward toward the edges of the circle. Repeat this process horizontally, connecting the left and right vanishing points. Your circle should now look like a wireframe globe with latitude and longitude lines.
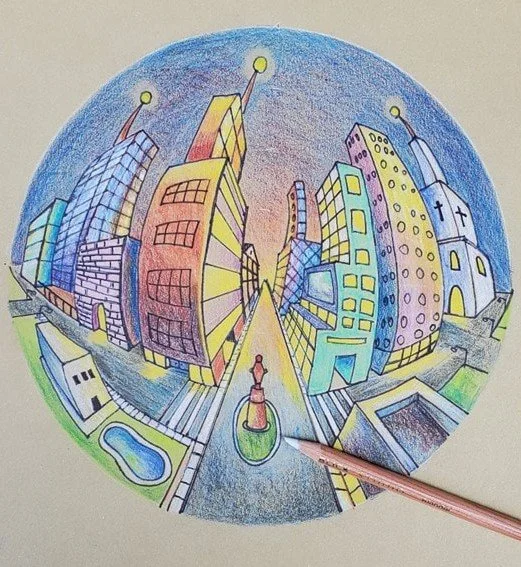
Five Point Perspective City Drawing (Bruce Black)
3.Sketch the Cityscape:
Using those curved orthogonal lines as your guides, begin building your skyscrapers. Remember the three rules: vertical edges follow the up/down curves, horizontal edges follow the left/right curves, and roads or depth lines pull straight into that dead-center dot.
4.Ink Your Final Lines:
Once your pencil layout is complete and your city is structured, take your Sharpie marker and carefully trace over only the permanent architectural lines of your buildings and roads.
5.Erase and Color:
Take your eraser and thoroughly remove all the leftover pencil marks, including the original grid and the edges of the circle. Your cityscape will pop off the page. Finally, use your colored pencils to bring the city to life. Try using warm colors for the brightly lit faces of the buildings, and cool colors for the deep shadows to enhance the 3D effect.
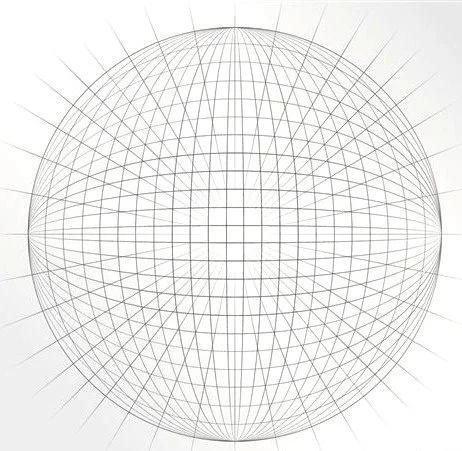
Five Point Perspective Drawing Template
I hope you enjoyed this fun tutorial on drawing a city in five-point perspective.
Please check out my Gallery website as well.
